Building models
The five-step New Model wizard: describe your business, check how RIA read your data and answer its questions, confirm the design, load your data, and solve your baseline.
New Model in the left rail opens one screen with five numbered steps: Describe, Clarify, Build, Load data, Solve. You work one screen at a time. The step rail on the left lists all five and, under the step you are standing in, every screen inside it; a numbered square becomes a check when a step is done.
The Previous / Next bar sits at the top of the content, above the zone header that reads
Step 1 of 5 · DESCRIBE with a status pill — IN PROGRESS, WORKING or DONE. Next is
the only way forward, and when it is dim, clicking it tells you what is missing rather than doing
nothing.
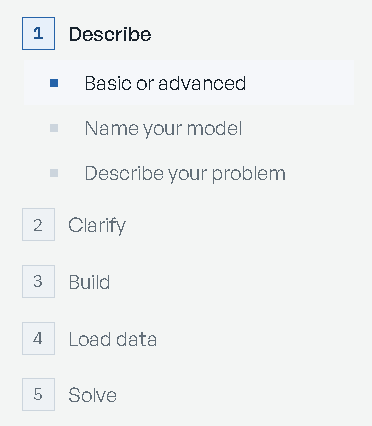
Every step opens on an intro screen that says "In this step you are able to:" over three bullets. Long work — a build, a bind, a solve — runs on a screen with a live elapsed clock and the promise "You can leave this page; the work keeps running." If a wait runs past a minute and a half, the line changes to "This is taking longer than it should. Anything that started is still running, and nothing you did has been lost." and Stop waiting and go back returns you to the page you were on, with your notes and answers as you left them. Your position is kept per model, so leaving and coming back from the Model Library lands you where you left off.
| Step | What it does |
|---|---|
| 1 Describe | You name the model and say what you want, how the business runs, and which datasets to attach. |
| 2 Clarify | If you attached data, you check how RIA read it. Then RIA asks about what you left unclear, as hard as you tell it to. |
| 3 Build | You check the design section by section and accept it; the structure is built and proven on generated sample data. |
| 4 Load data | You point each table the model asks for at a dataset — or keep the sample numbers. |
| 5 Solve | The baseline is solved and read back to you in business language. |
Basic or advanced
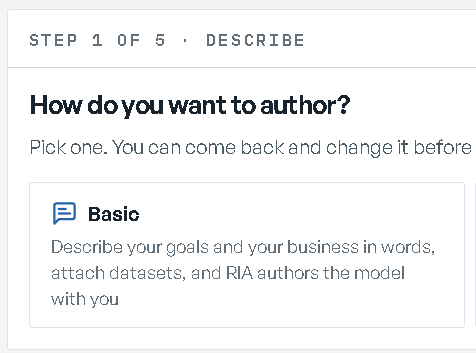
The first screen is "How do you want to author?" — "Pick one. You can come back and change it before the build."
- Basic — describe your goals and your business in words, attach datasets, and RIA authors the model with you.
- Advanced — bring a model you already have: a Python model spec, a CSV data pack, or an
existing model file (
.corz). See Advanced imports.

The two do not mix: one model is either authored from your words or brought in from a file. In Advanced mode, Clarify is skipped — the model you bring is the model, and nothing is authored on top of it.
The rest of this page follows Basic.
Step 1 — Describe
Name your model
"This name will be used throughout EODE to refer to this model. Try to make it unique." The placeholder shows the shape it expects: "Stapler Mfg Co, next quarter". Next creates the model record, so from here on the model exists in your Model Library and renaming it here renames it there.
Describe your problem
The hub says "Add one or more of these. Anything you leave out, the next step asks about." Three rows, each with an Add button that becomes Edit once you have said something, and a green summary of what you said:
| Row | What goes in it |
|---|---|
| Describe your goals | "What the model should make better, and what must not break" |
| Describe your business | "What you make or do, where, with what, and what gets in the way" |
| Upload or select relevant datasources | "Attach datasets you already have, or upload new ones" |
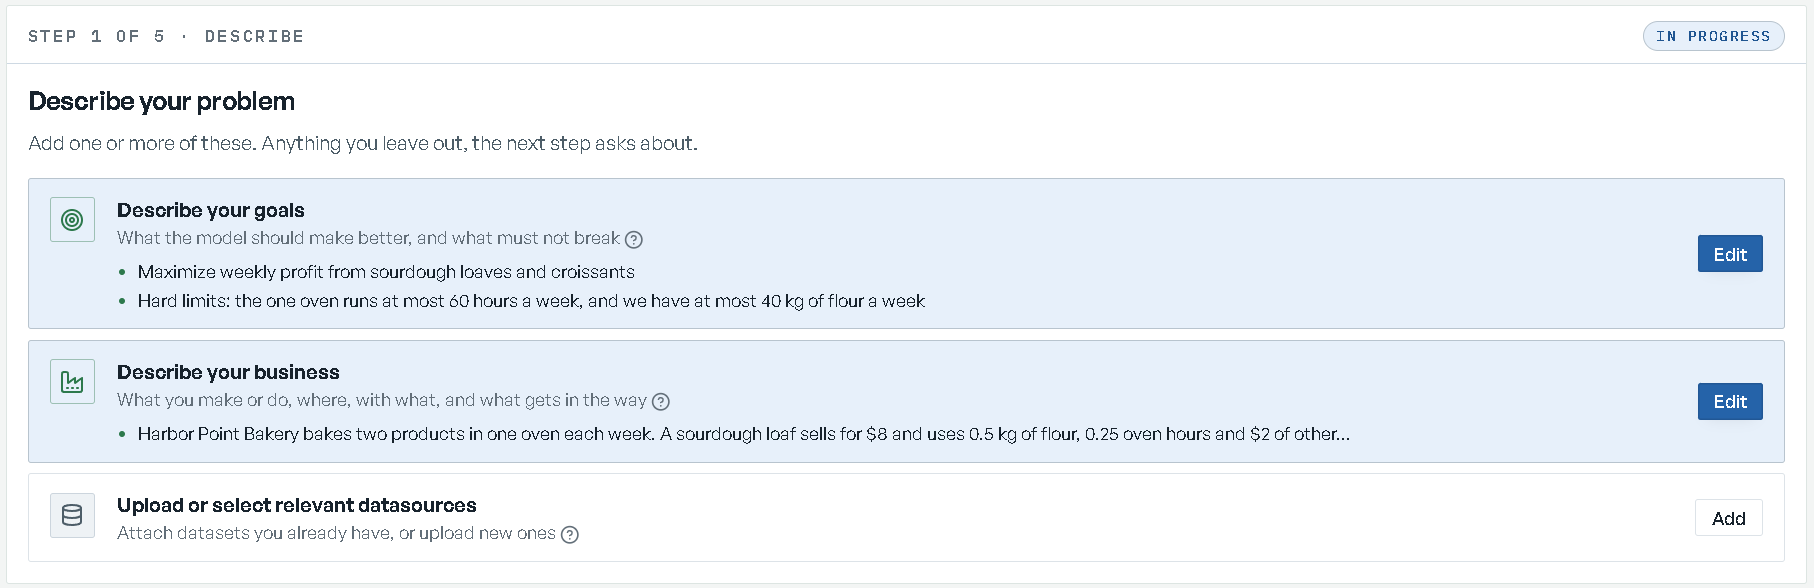
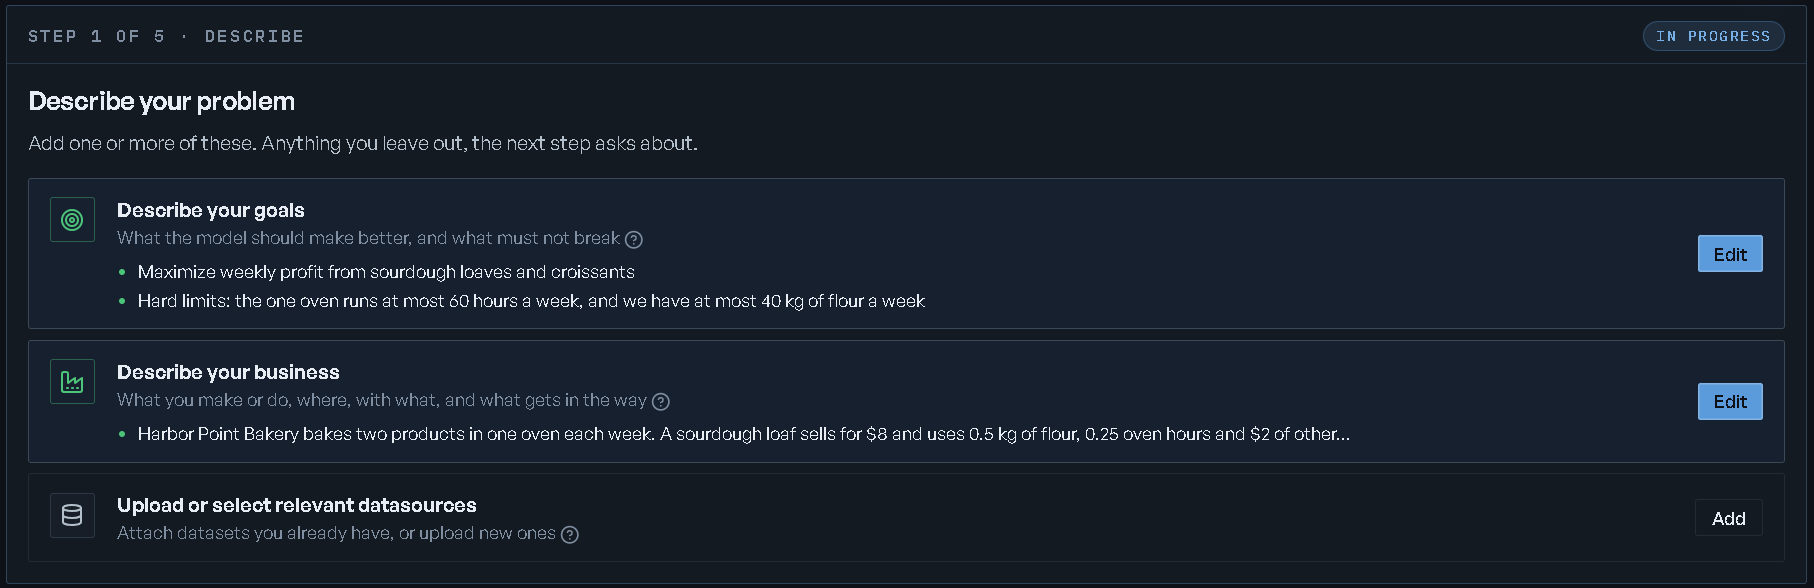
Describe your goals opens its own list — "What to make better, and what must not break." — with
two rows: What to optimize ("The one number the model should push") and Hard limits
("What must not break while it does"), each with Add, then Edit once filled. The bar's
Save becomes Finish once both are filled. What to optimize is a sentence you complete:
I want to + Maximize / Minimize + what, in your words (placeholder: "profit across all
three stapler models next quarter"). The words you type here are what the solved number is called
at step 5. Hard limits starts "Hard limits I'm aware of in my model are that" and takes a
paragraph — rules the plan must never break, like "each line can run at most 16 hours of overtime
a week, and Line A only runs the heavy-duty model". Soft preferences belong in the business
description instead.


Describe your business is one textarea: "What does the business make or move, who does it serve, and what limits the plan? Write as much as you like."
Attaching data
Upload or select relevant datasources is where spreadsheets and live sources come in, and both arrive as a dataset:
- Upload new datasets and attach them to this model opens the Import Data window — the same one the Datasets rail item uses. Pick a source, authenticate, choose which resources to pull, then Import data → and Attach to this model →. See Import data for the window itself, and Data integration for the catalog and the connect step.
- Select data from previously connected datasets lists everything already on your Datasets tab:
"Select as many as apply." Each row reads the dataset name and
N resources · N rows · source.
One dataset can serve several models, and you maintain it in one place.
Leaving the hub, Next reads what you gave it — the working screen says "Reading what you told me" — and takes you to Clarify. With a dataset attached, Clarify first shows you how that data was read; see Your data, as I read it. Return to this hub and change nothing, and Next simply moves on without rebuilding.
Step 2 — Clarify
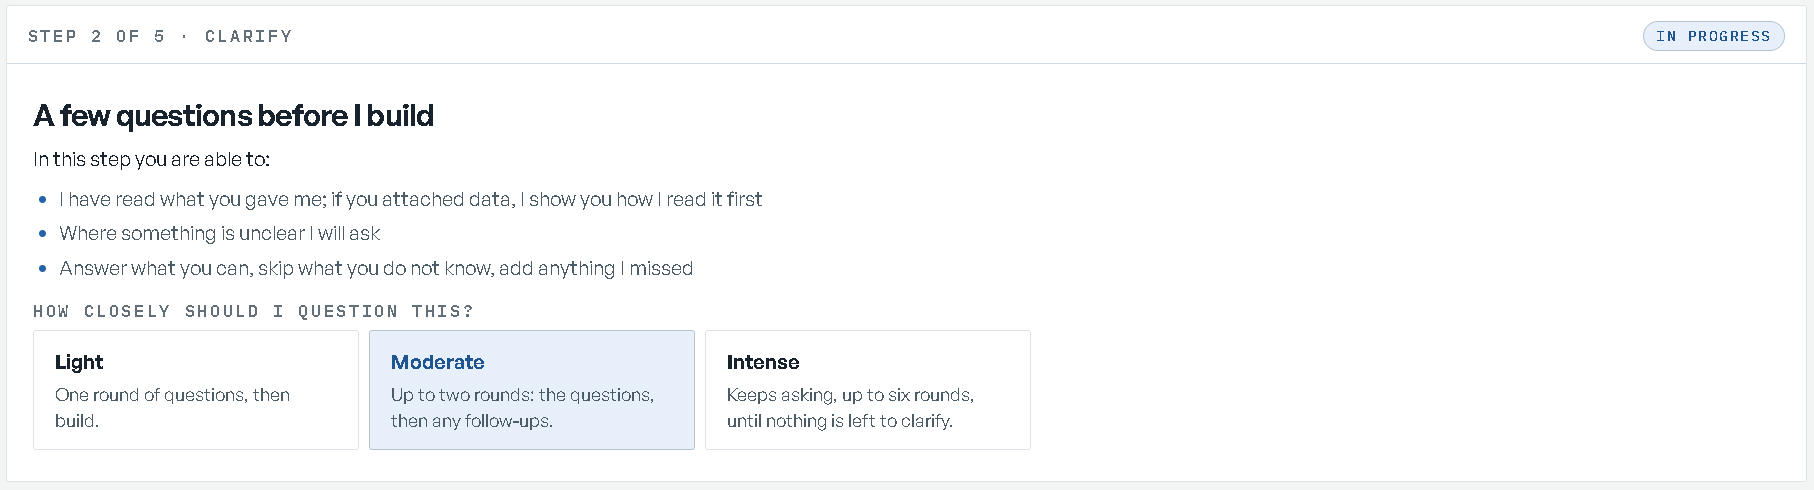
The intro is "A few questions before I build": "I have read what you gave me; if you attached data, I show you how I read it first" · "Where something is unclear I will ask" · "Answer what you can, skip what you do not know, add anything I missed".
The scrutiny dial
On that same intro, under "How closely should I question this?", you set how hard RIA pushes. The default is Moderate.
| Setting | What it means |
|---|---|
| Light | "One round of questions, then build." |
| Moderate | "Up to two rounds: the questions, then any follow-ups." |
| Intense | "Keeps asking, up to six rounds, until nothing is left to clarify." |
Your data, as I read it
When you attached a dataset at step 1, nothing is designed until you agree how it was read. The
reading runs first, on a wait titled Reading your data that counts Read {n} of {m} sheets; you
can leave it, and the reading carries on. Then four screens, each its own row in the step rail:
| Rail row | What you decide |
|---|---|
| Your data, as I read it | Which sheets the model reads, and where its lists of names come from. |
| The columns and the terms | What each column means, and any unit or term RIA could not settle. |
| What is missing | What to do about each thing the model needs that your sheets do not carry. |
| What you want to decide | One sentence saying what the model is for. |
Every choice saves as you make it.
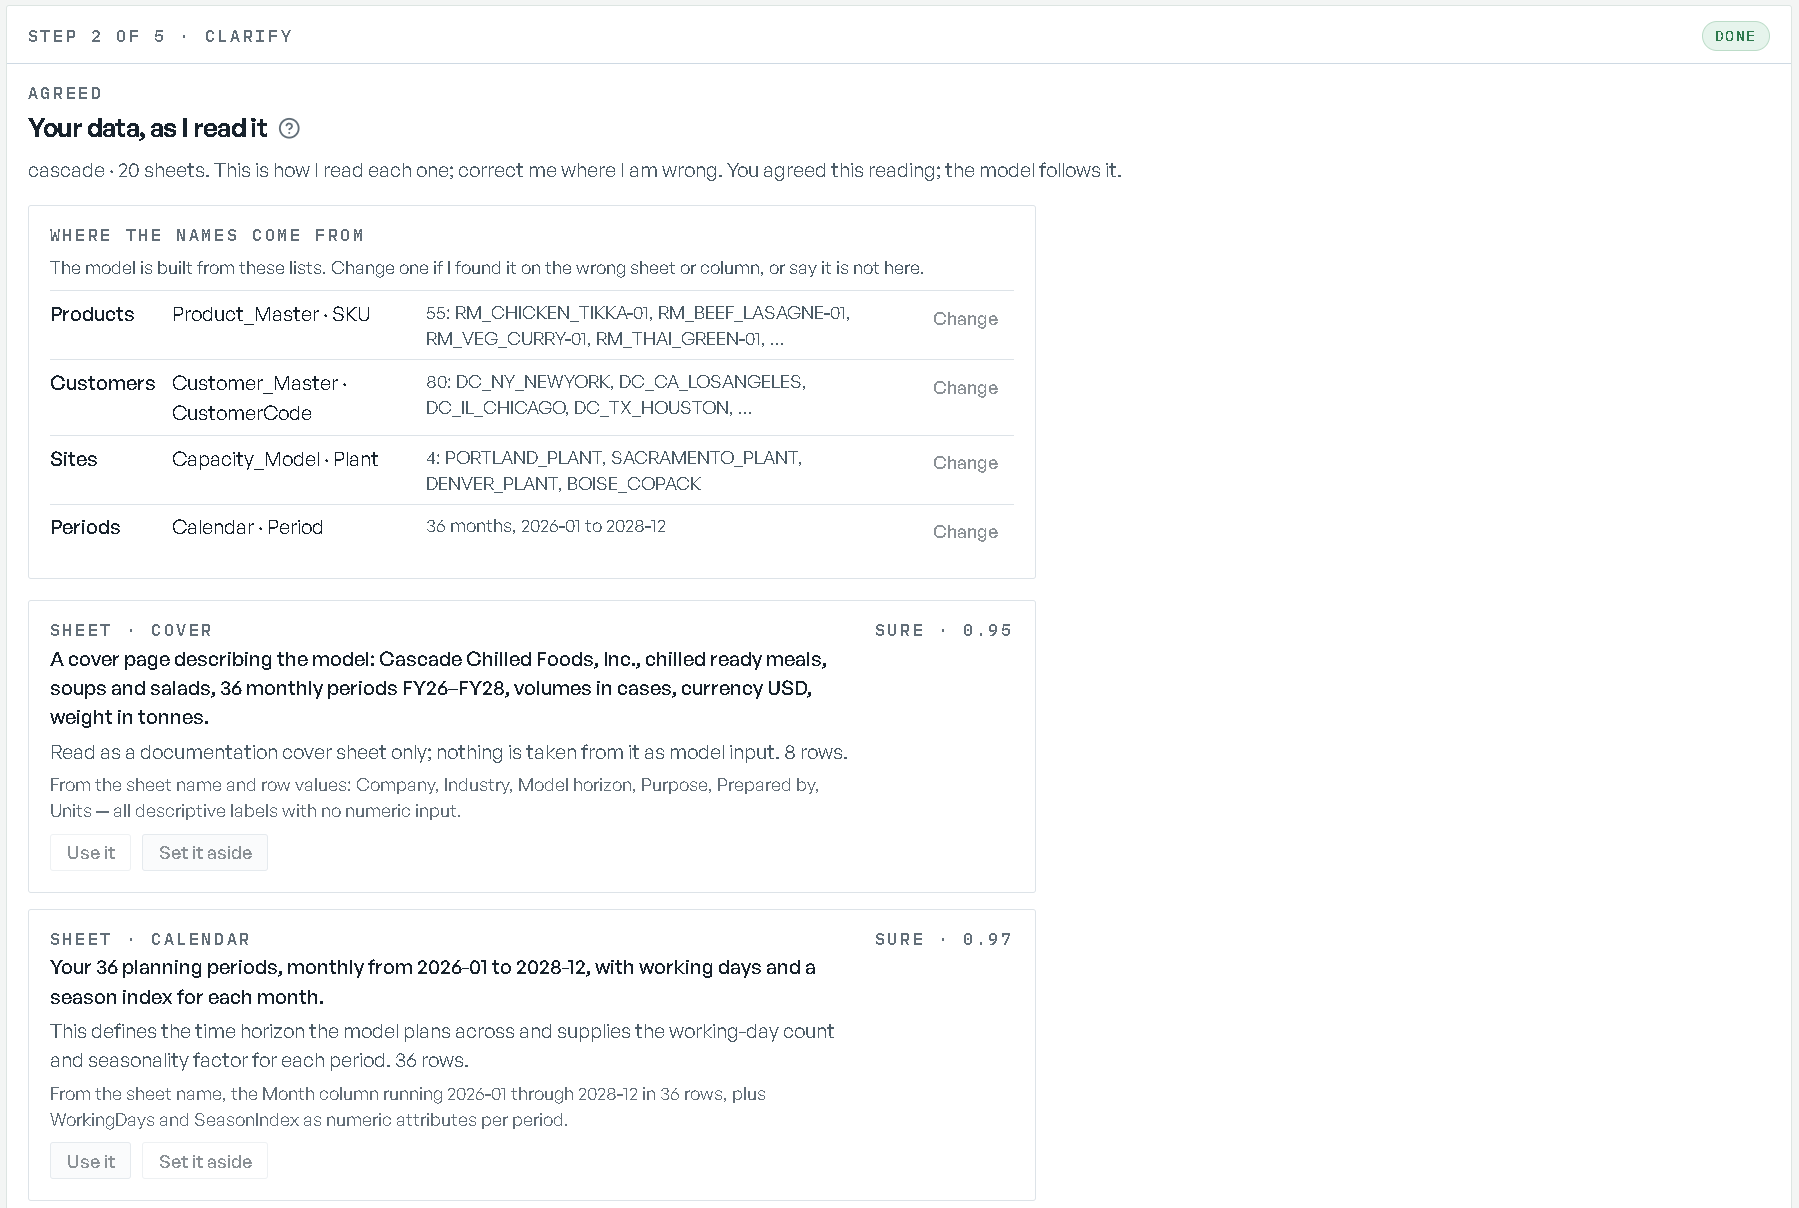
Your data, as I read it opens with "This is how I read each one; correct me where I am wrong." Above the sheets, WHERE THE NAMES COME FROM shows the four lists the model is built from — Products, Customers, Sites and Periods — each with the sheet and column it was found in and a few of its values. Change lets you point one at another sheet and column, or mark it Not in this workbook.
Below that, one card per sheet: RIA's sentence about the sheet, its row count, why it read it that way, and how sure it is — SURE, LIKELY or GUESSING, with a score. Each card takes one of two verbs, Use it or Set it aside; Change reopens the choice. A sheet RIA is guessing about has to be decided: "Next waits for the sheet I am guessing about: use it, or set it aside."
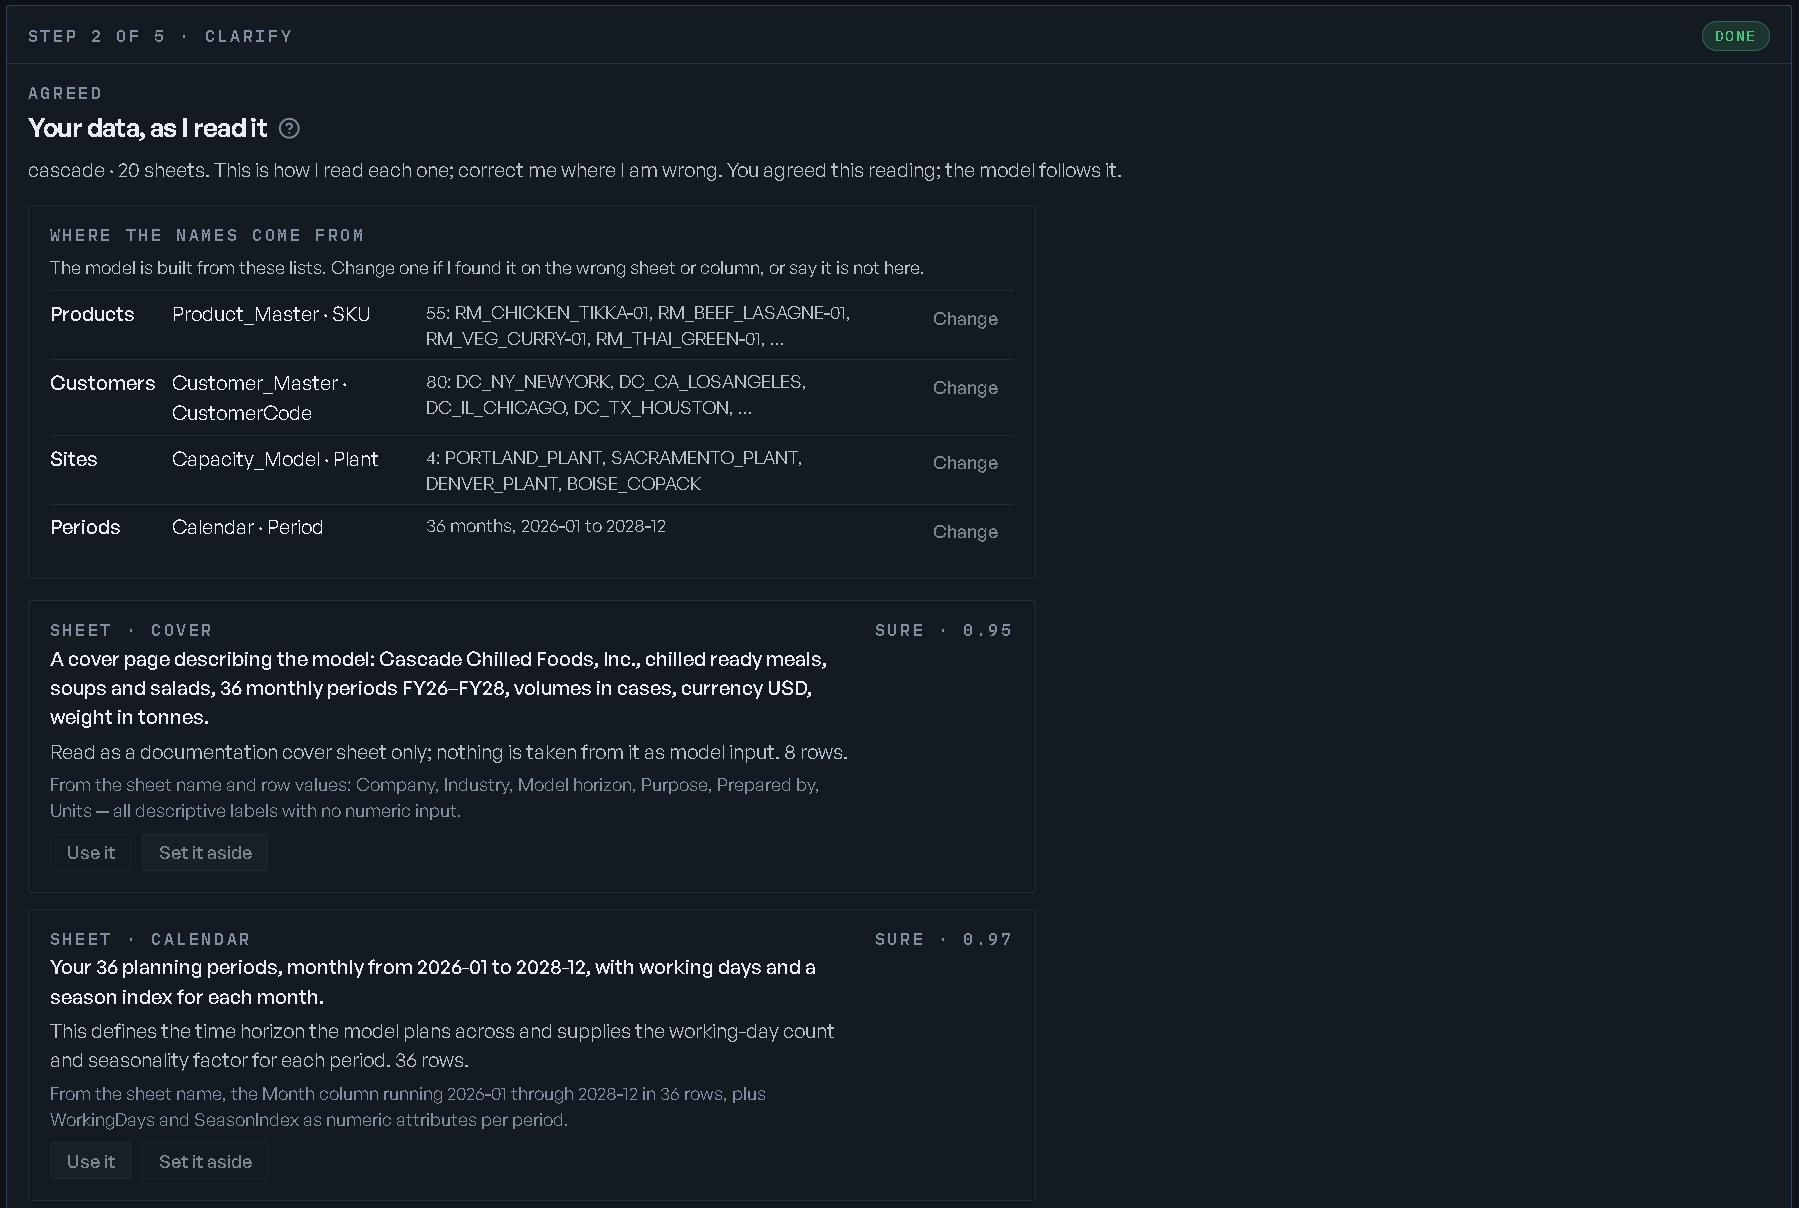
A card also says when the reading did not reach everything: a sheet read "Quick read only", columns past the part it read ("Nothing in them reaches the design."), or a table read out of a report sheet, with where in the sheet it came from.
The columns and the terms shows a table per sheet you are using — Column, I read it as,
Names, Unit, Sure — with a counter of the terms still open ({n} TERMS TO SETTLE). A
column RIA could not settle asks its question once, here, with the answers to pick from and a field
for another unit. Any other row takes Correct.
What is missing opens the screen What your data does not say, one card per gap, counted
{n} OF {m} DECIDED. Each gap takes one of four answers:
| Answer | What happens |
|---|---|
| Assume it, with my consent | RIA's proposed value is used and written to Assumed, as consented. |
| Supplied: it is in... | You say which sheet or column holds it, or say it in a sentence: "Written to Rules, source: you." |
| Scope it out | "Left out on purpose. The model will not carry it." |
| Stop here | "The walk stops here. Come back with the data; the model waits at this step." |
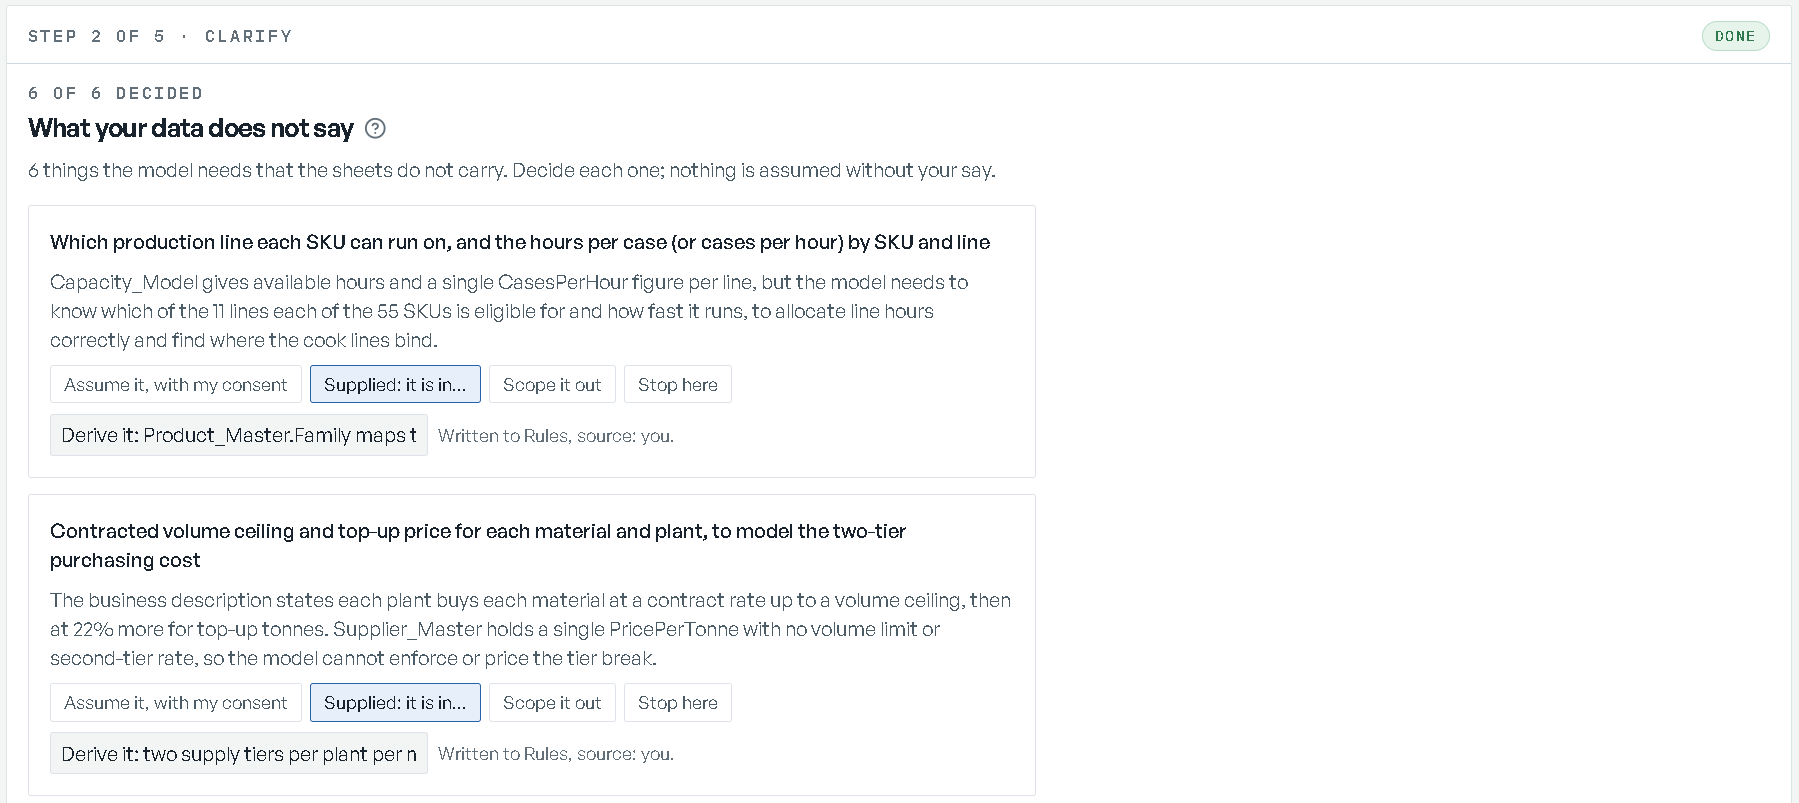
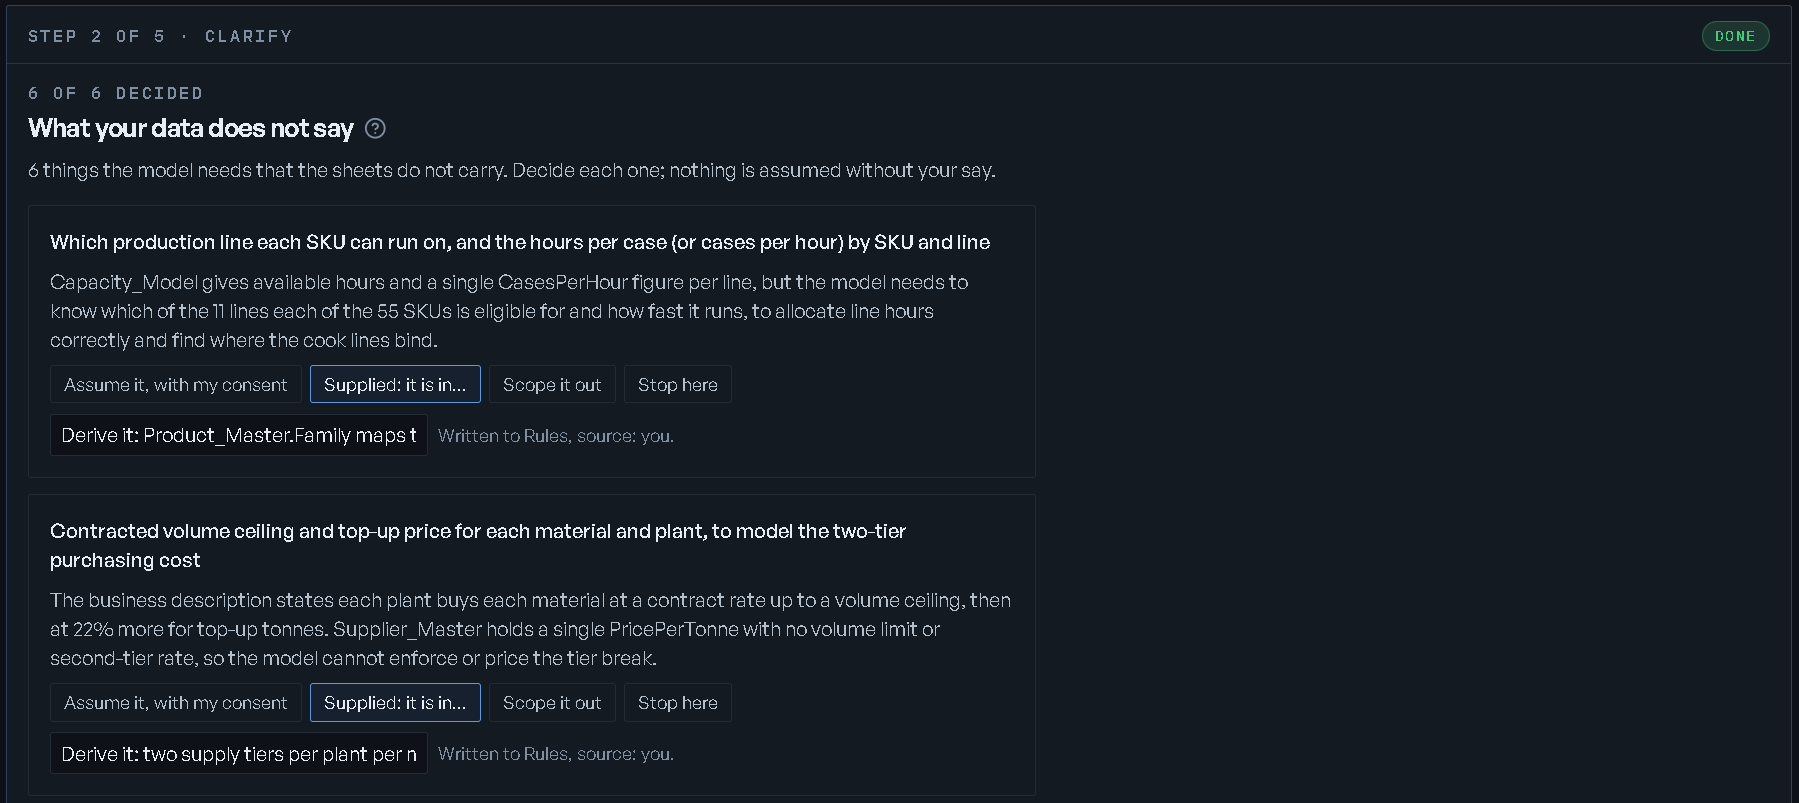
What you want to decide asks "In one sentence, what decision should this model help you make?" — "Your data shows what your business looks like; it does not say what you want to work out." The box starts with what you wrote at step 1, or, if you wrote nothing, a starting point drawn from the reading for you to rewrite. The sentence is recorded as yours.
Next on that last screen is Design on this reading. It waits until every sheet, term and gap is decided and no gap reads Stop here. Once you agree, the screens stay readable — "You agreed this reading; the model follows it." — and Clarify goes on to its questions, or straight to the build if it has none.
Answering
One question per screen, and each question is its own row in the step rail, so you can jump back to any of them. The sub-line counts you through: "Question 3 of 6. Skip what you do not know."
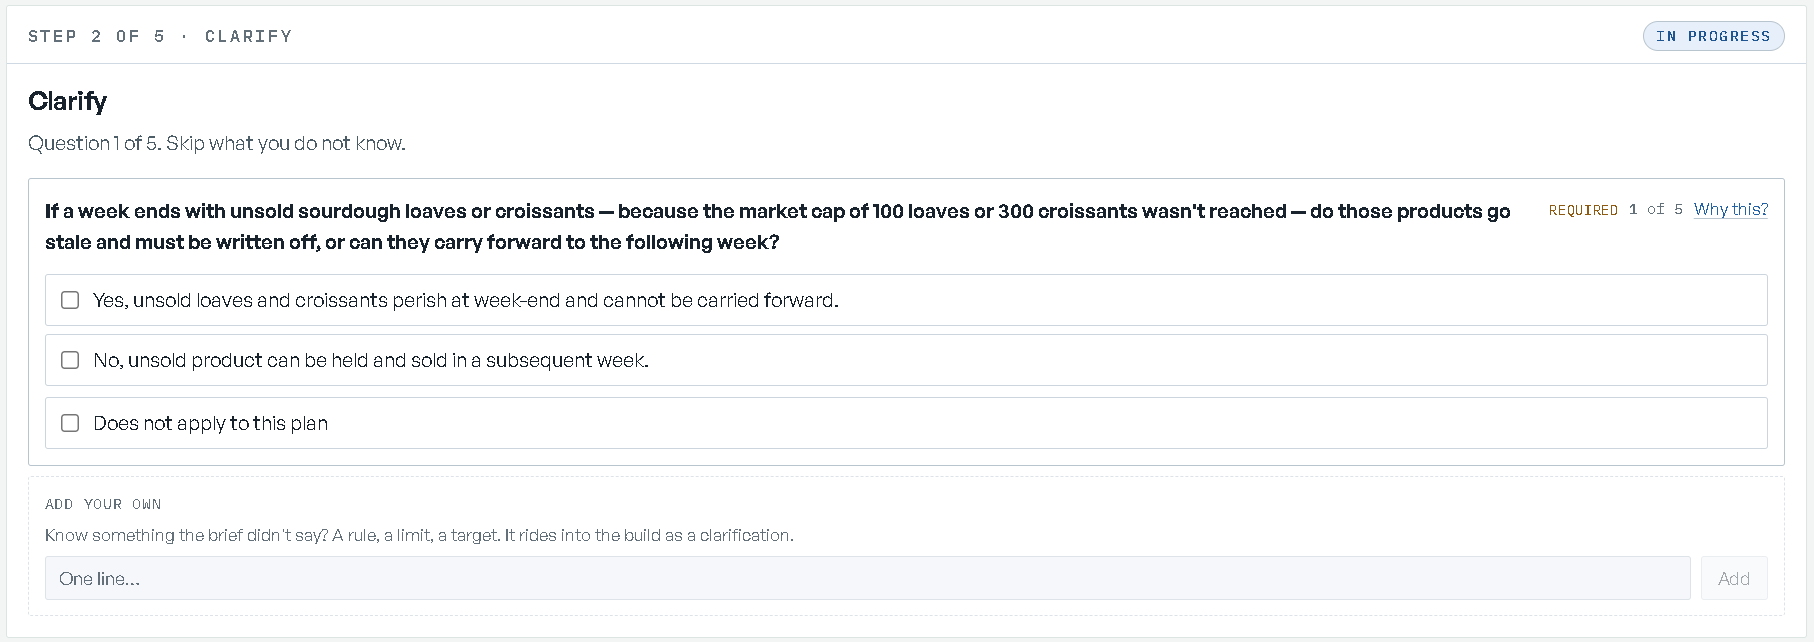
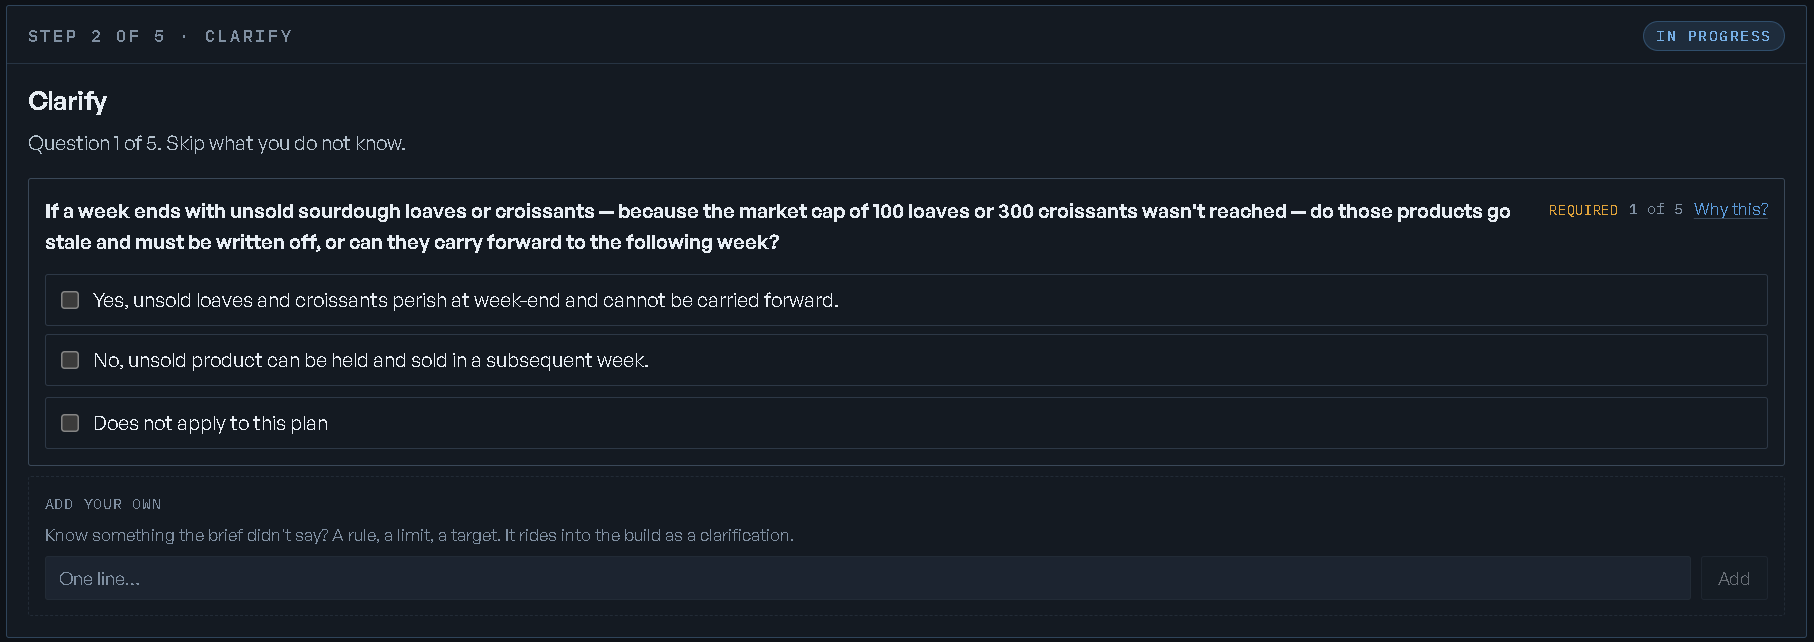
- Each question is chipped REQUIRED or OPTIONAL, and Why this? reveals why it is being asked at all.
- Answer by picking an option, or mark it Does not apply to this plan.
- ADD YOUR OWN takes anything the questions did not cover: "Know something the brief didn't say? A rule, a limit, a target. It rides into the build as a clarification." Words you add while a question is open count as that question's answer, and show under its options with a × to remove them.
- Next becomes Skip on an optional question you have not answered, and Finish answering on the last one. Once only optional questions remain, the link Skip all remaining optional questions clears them in one go.
When your description values the plan by net present value (NPV) but does not say which figure it discounts, Clarify asks, as a required question: "Your plan is valued by NPV. Which figure should it discount: the cash the business throws off each period, or the accounting profit?" — answered Discount the cash the business throws off (free cash flow) or Discount the accounting profit (net income). If it also does not say when the first period's cash counts, an optional question asks that too: The first period is undiscounted, counted as of today or Every period is discounted, the first included. Either answer is written into the model, and the design names the figure it discounts.
Required questions have to be answered or marked as not applicable before you can leave. After you finish, RIA spends a moment "Checking whether anything else needs clarifying" — on Moderate or Intense that can raise another round, and the heading becomes "A few more questions". If nothing is left, the screen says "Nothing to clarify": "Everything I need is in what you gave me. Next builds the model."
Once the model is built these answers stay on the step, read-only, behind a Change my answers button.
If the dataset you attached is a workbook holding more than one scenario, this step also asks "Which scenario is the base?". Picking one other than the workbook's own default makes eode set the selector and recalculate the workbook before it builds — the wait says "Recalculating the workbook for" your pick.
Step 3 — Build
The intro is "Here is the shape I propose": "I build the structure and generate sample data to prove it" · "You confirm the design one section at a time" · "Anything wrong sends it back for a rebuild".
The step has three rows in the rail: Building, Check the design and Review. When the design waits for your sign-off before anything is built, the first row reads Design drafted instead; see When the design is drafted first.
Building
"Building the structure" runs with a progress bar and an elapsed clock. The sub-line is "Building the structure, generating sample data, running the checks." — or, for a workbook, "Translating your workbook into the model's structure and data." It lands on "The structure is built" / "Next confirms the design."
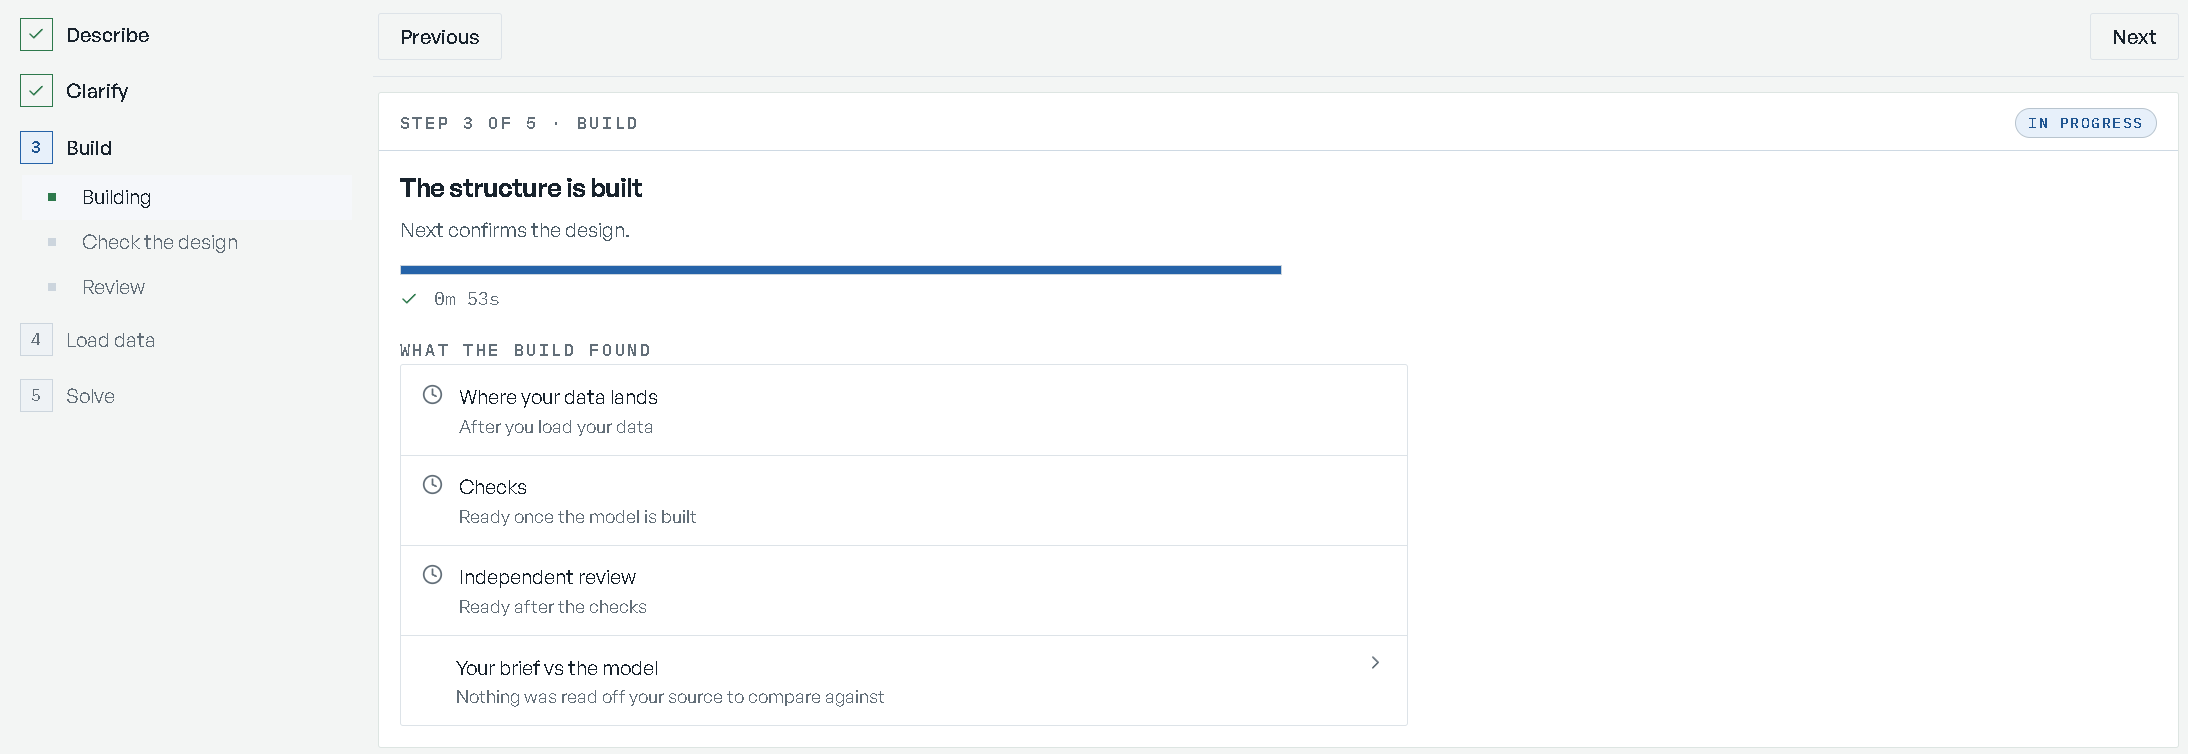
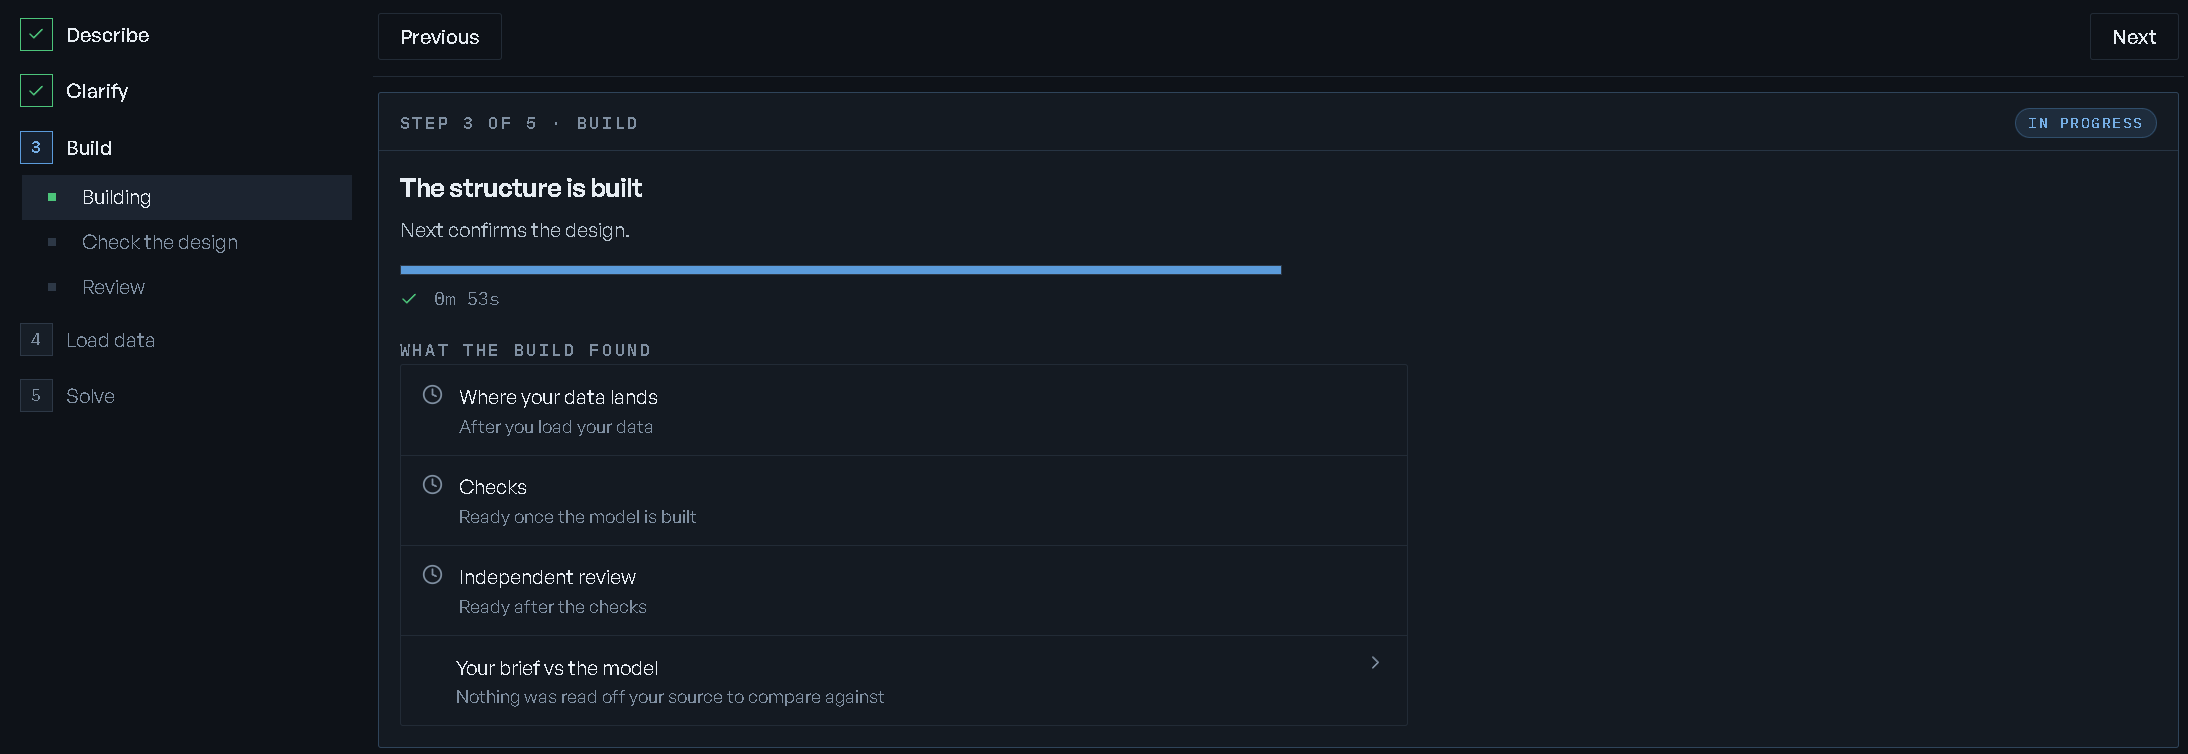
Under it, WHAT THE BUILD FOUND lists four readouts, each with a one-line standing and a fold that opens its detail. Checks and Independent review open by default.
| Readout | What it shows |
|---|---|
| Where your data lands | Which of your columns the model took, which it could not place and why, and where a stand-in value is still filling in for a number of yours. |
| Checks | Every structural check the build ran, as want against got, with the numbers behind them. |
| Independent review | A separate pass over the built model against your brief: what it scored, what it says is missing, and what it says was invented. |
| Your brief vs the model | What your brief asked for, set against what the model contains. It does not change what was built; it lists what your brief pointed at, what was left out on purpose, and what plans like yours usually, often or sometimes carry. |
A readout with nothing to show yet says what it waits for — "After you load your data", "Ready once the model is built" — rather than hiding. An item Independent review says is missing can carry Add it and Leave it out; see Validation and trust for what each does.
If the build stops, the screen reads "The build stopped" and says which stage in plain words — for example "The model was built but did not pass its checks." — with Build again. When the model's data check rejected it, the screen says how many errors it found and lists them; if the same errors come back on a second run, it says so, because the inputs need a change before another build. Otherwise "Build again usually gets past this; if it keeps stopping, the inputs need a look." Previous returns to the inputs, and the build runs again from there.
When the design is drafted first
Some models draft a design for your sign-off before anything is built; others build first and ask you to check the design afterwards, as described below. The step rail tells you which: the first row under Build reads Design drafted instead of Building.
The page is Check the design, holding one card, Confirm the design before anything is built: "Your description has been read and the model drafted — nothing is built or solved yet. Review what landed, what wasn't used, and what was assumed; then confirm to build, or reject with a reason." (For a model built from a workbook it starts "Your workbook has been read".) On it:
- MODEL DESIGN, with a summary line of what is waiting on you — for example "1 assumed value awaits your sign-off · 1 thing you asked for is not in this model yet · checks that will run once the model is built".
- Under FOR YOUR SIGN-OFF, the sections DECISION, SCOPE, RULES, ASSUMED and
WHAT IT DOES, each with Confirm. A count underneath, such as
0 / 5 confirmed, tracks you through them. - Planning horizon, when the draft had to assume how many periods to plan over because your description gave a rhythm but no count. It says what it assumed and from which word, then offers to keep it or change it — on a weekly plan, Keep 13 weeks, 26 weeks, 39 weeks, 52 weeks or One combined period. Picking another span redrafts the design on the same model.
- Assumed values waiting for your decision: each value nobody gave, with Approve or Reject…. Rejecting asks why — "the reason is recorded, and the value goes back for a real number."
- The How this is built (for modellers) drawer; see Validation and trust.
The bar holds Build the model, which is ready once every section is confirmed, and Something is wrong…, which asks "Reject this design?" and takes a reason: "Nothing is deleted: the design goes back a step with your reason recorded, and the reason steers the next attempt."
Build the model runs the build. When it lands, Check the design works as below: confirm each section or say what needs correcting, then Accept the design.
Check the design
Check the design puts every section of the design on one page — "Read each part and confirm it. Nothing is accepted until you do." Which sections appear depends on what the model has in it:
| Section | What it holds |
|---|---|
| DECISION | Your own words, played back — or, when you gave none, the sentence you agreed at the end of the reading. Shown for reference; there is nothing to confirm on it. |
| SCOPE | What the model names — products, resources, processes, periods — each with a count and its names. When your data holds more rows than the design names, it says so: {rows} rows on {sheet}; the design names {n} of them. |
| WHERE YOUR DATA LANDS | Which of your sheets feed which part of the model, {n} rows to load, and a Not used list of the sheets it set aside. |
| RULES | The goal, then every rule in plain English — "oven runs at most 60 hours per period" — and, where a rule came from your words, the words it came from. |
| ASSUMED | Every value nobody gave it, and what it used instead. |
| YOUR DATA | The tables it will ask you for at step 4. |
| WHAT IT DOES | What was built, and under Not yet, what was not. |
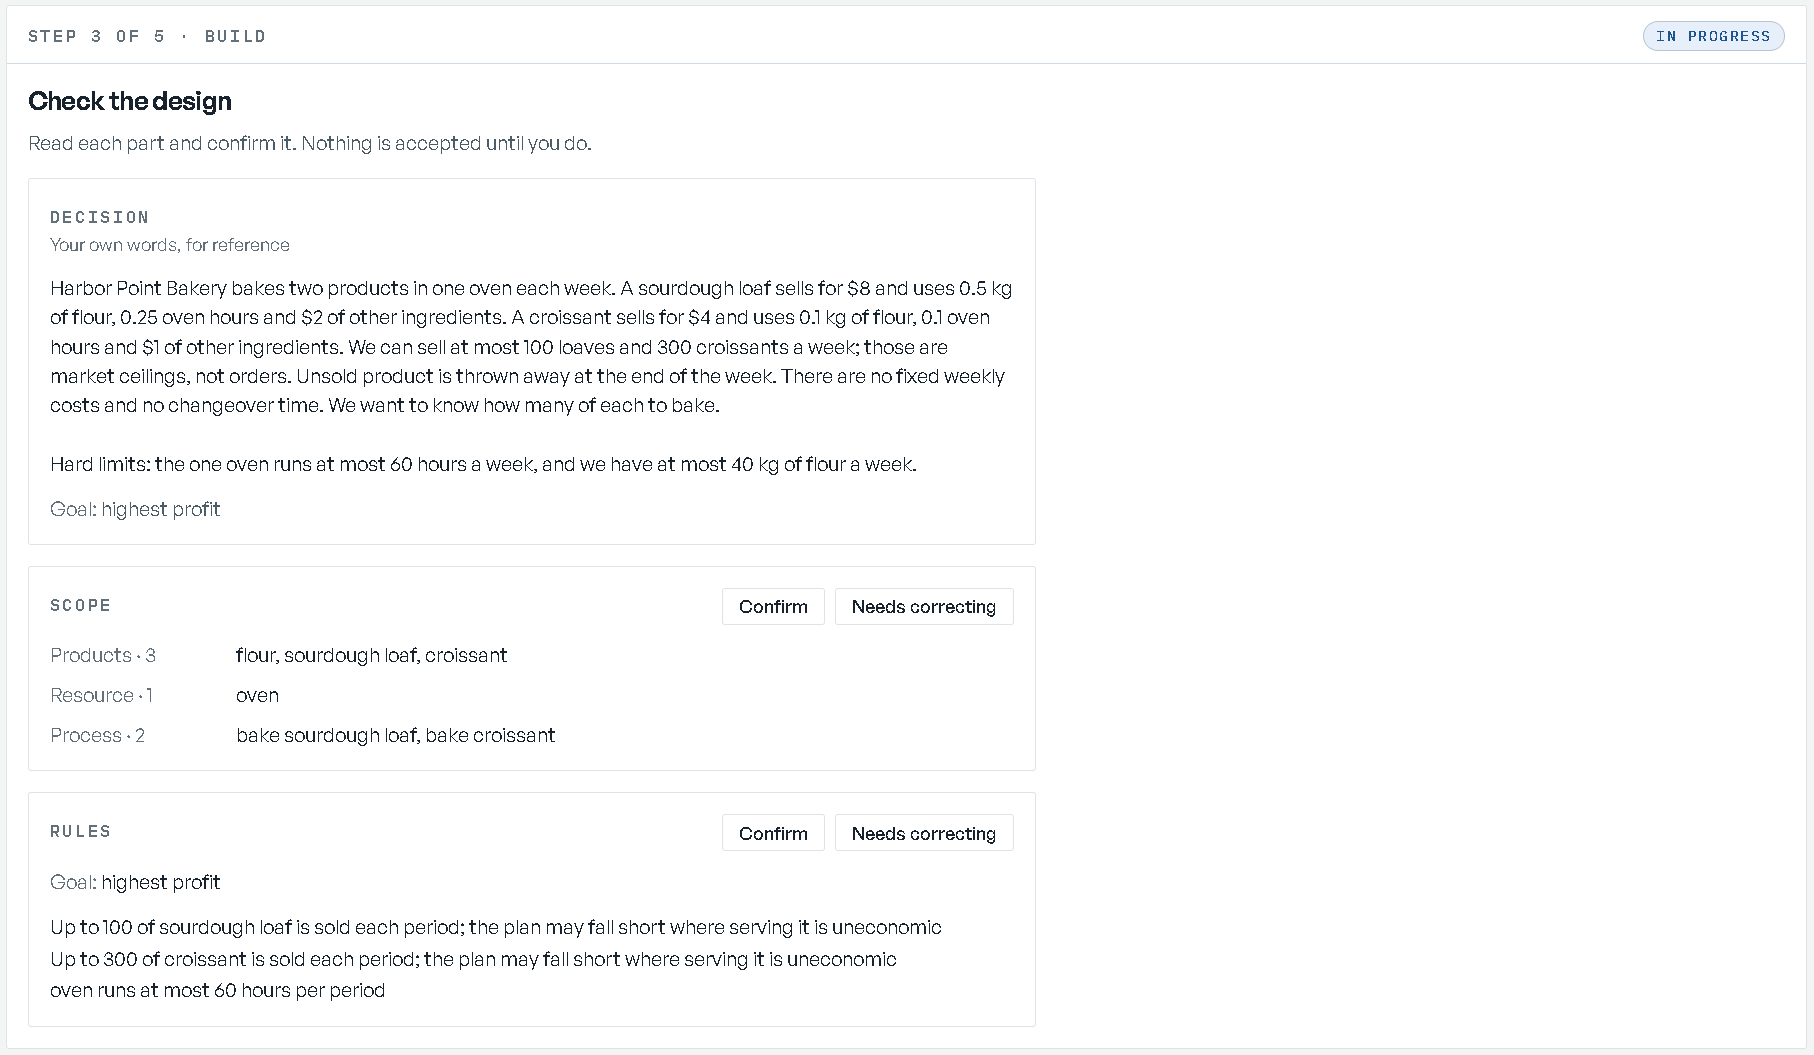
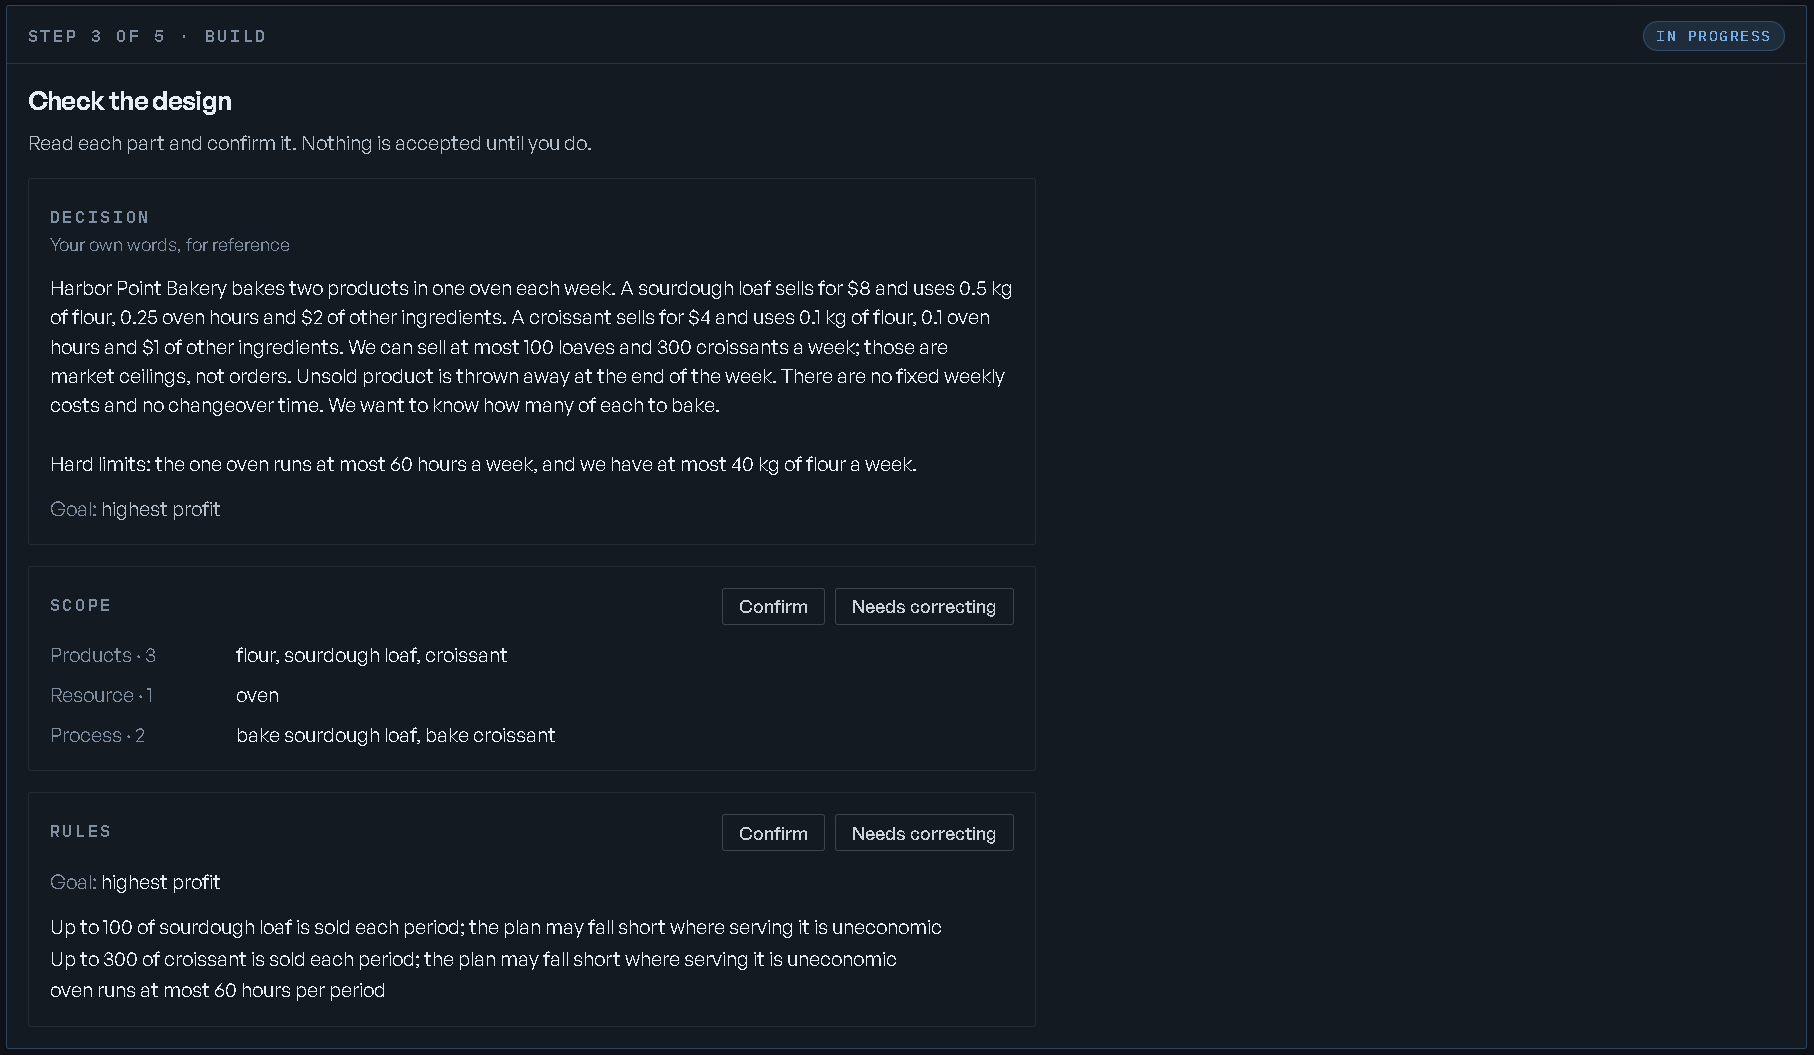
Each section you are asked about takes Confirm (it then reads Confirmed) or Needs correcting, which asks "What needs correcting in this section?" and takes a note, e.g. "Line A only runs the heavy-duty model; the design has it running all three". Under the note: "Your notes are listed on Review; Next rebuilds with them." Long lists show five entries, then +N more.
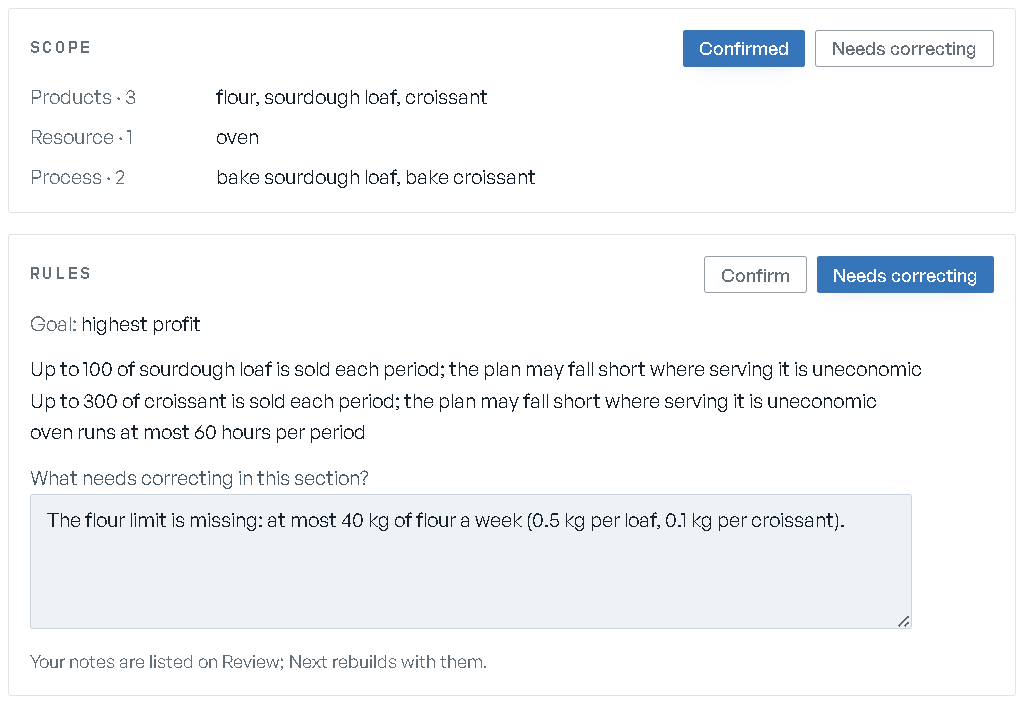
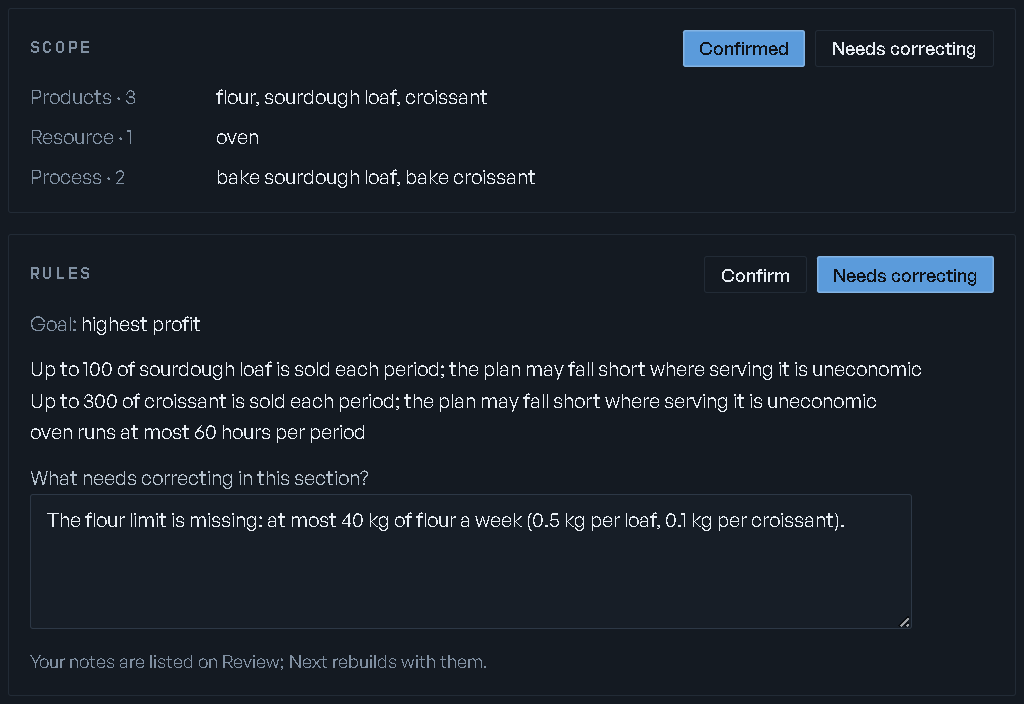
Next is the sign-off, and its label tells you which one you are giving:
- Accept the design — every section is confirmed. Accepting moves you on to Load data while the model finishes building; if that build stops, the wizard brings you back to Building.
- Rebuild with these notes — you wrote at least one correction. The design is built again with your notes on the record.
You cannot leave a section undecided: "Confirm every section first, or say what needs correcting."
When you come back to a model you have already sent corrections on, What you asked to be corrected sits above the sections and lists every note, newest first, then "Last sent back" with the date: "This is what you wrote, not what the model did with it. Check the parts below and say so again if any of it is still wrong."
Review
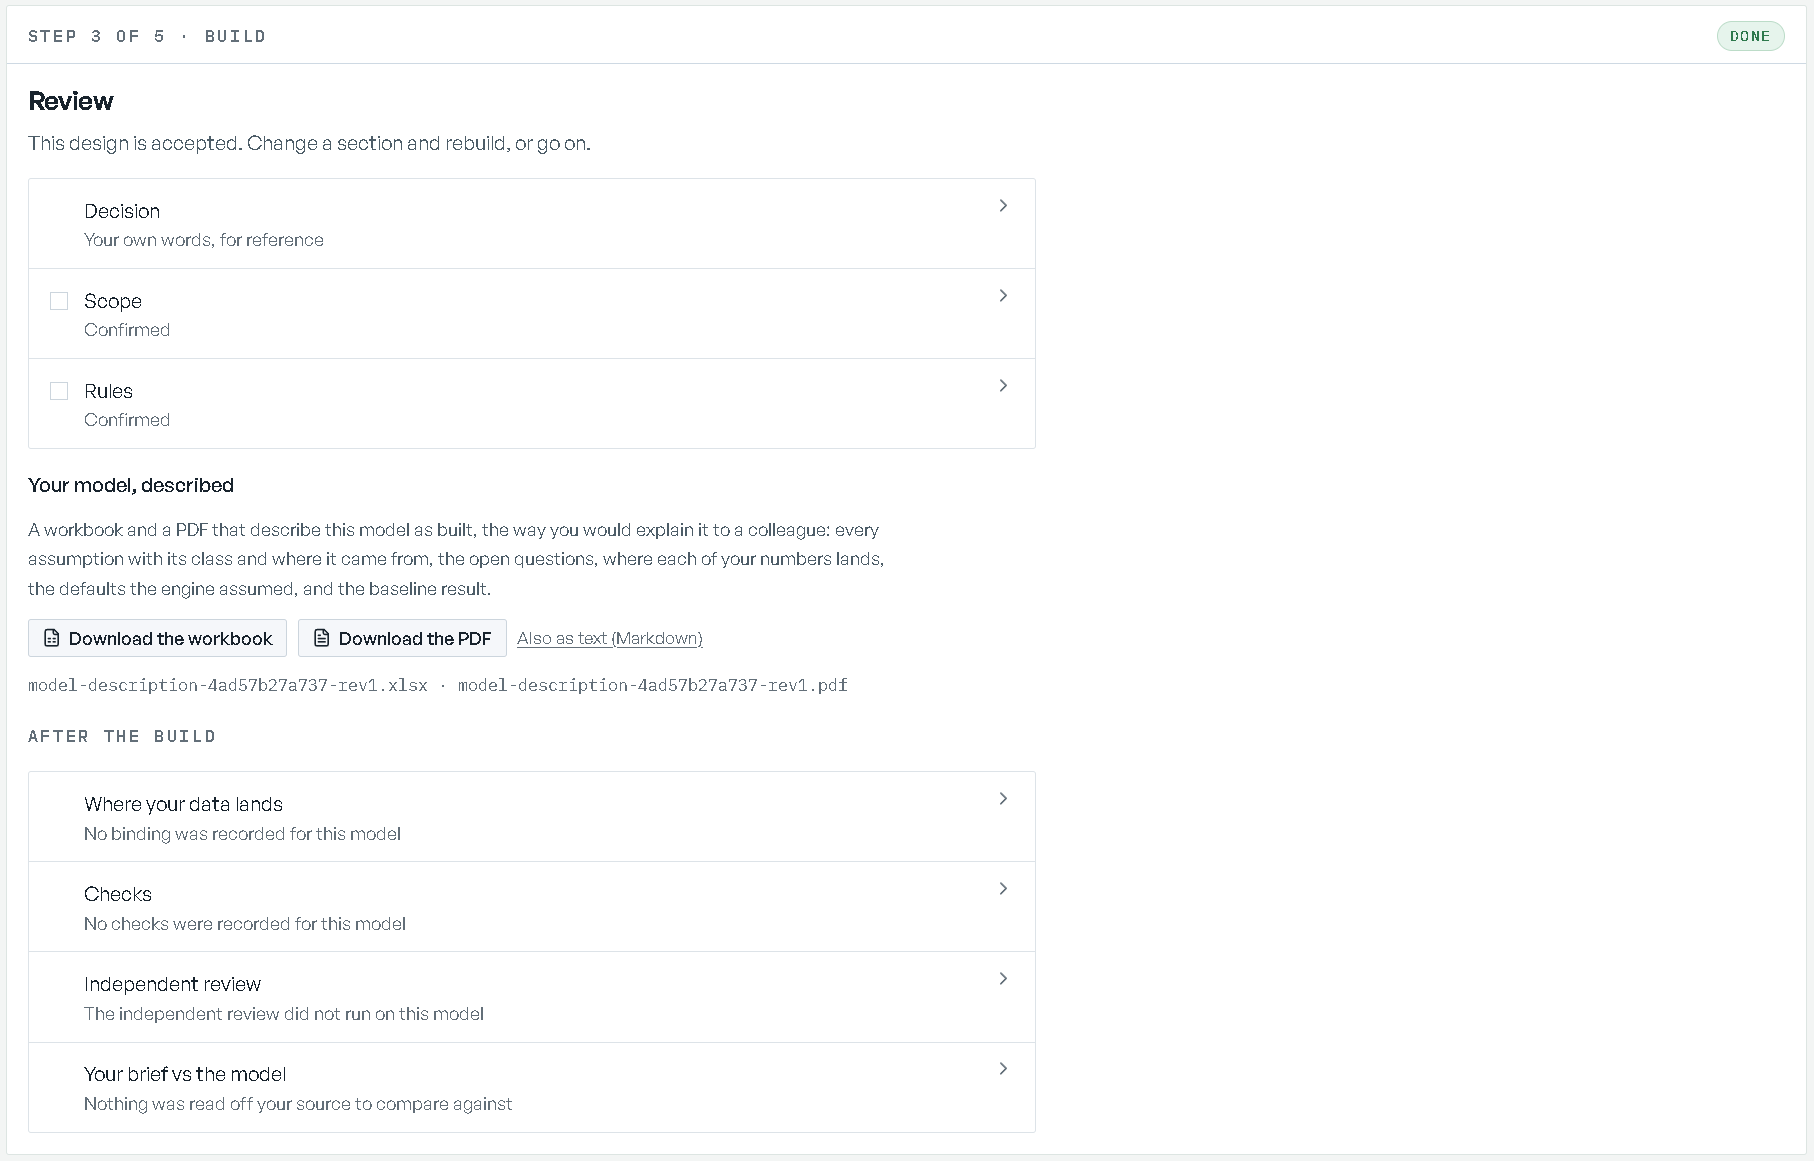
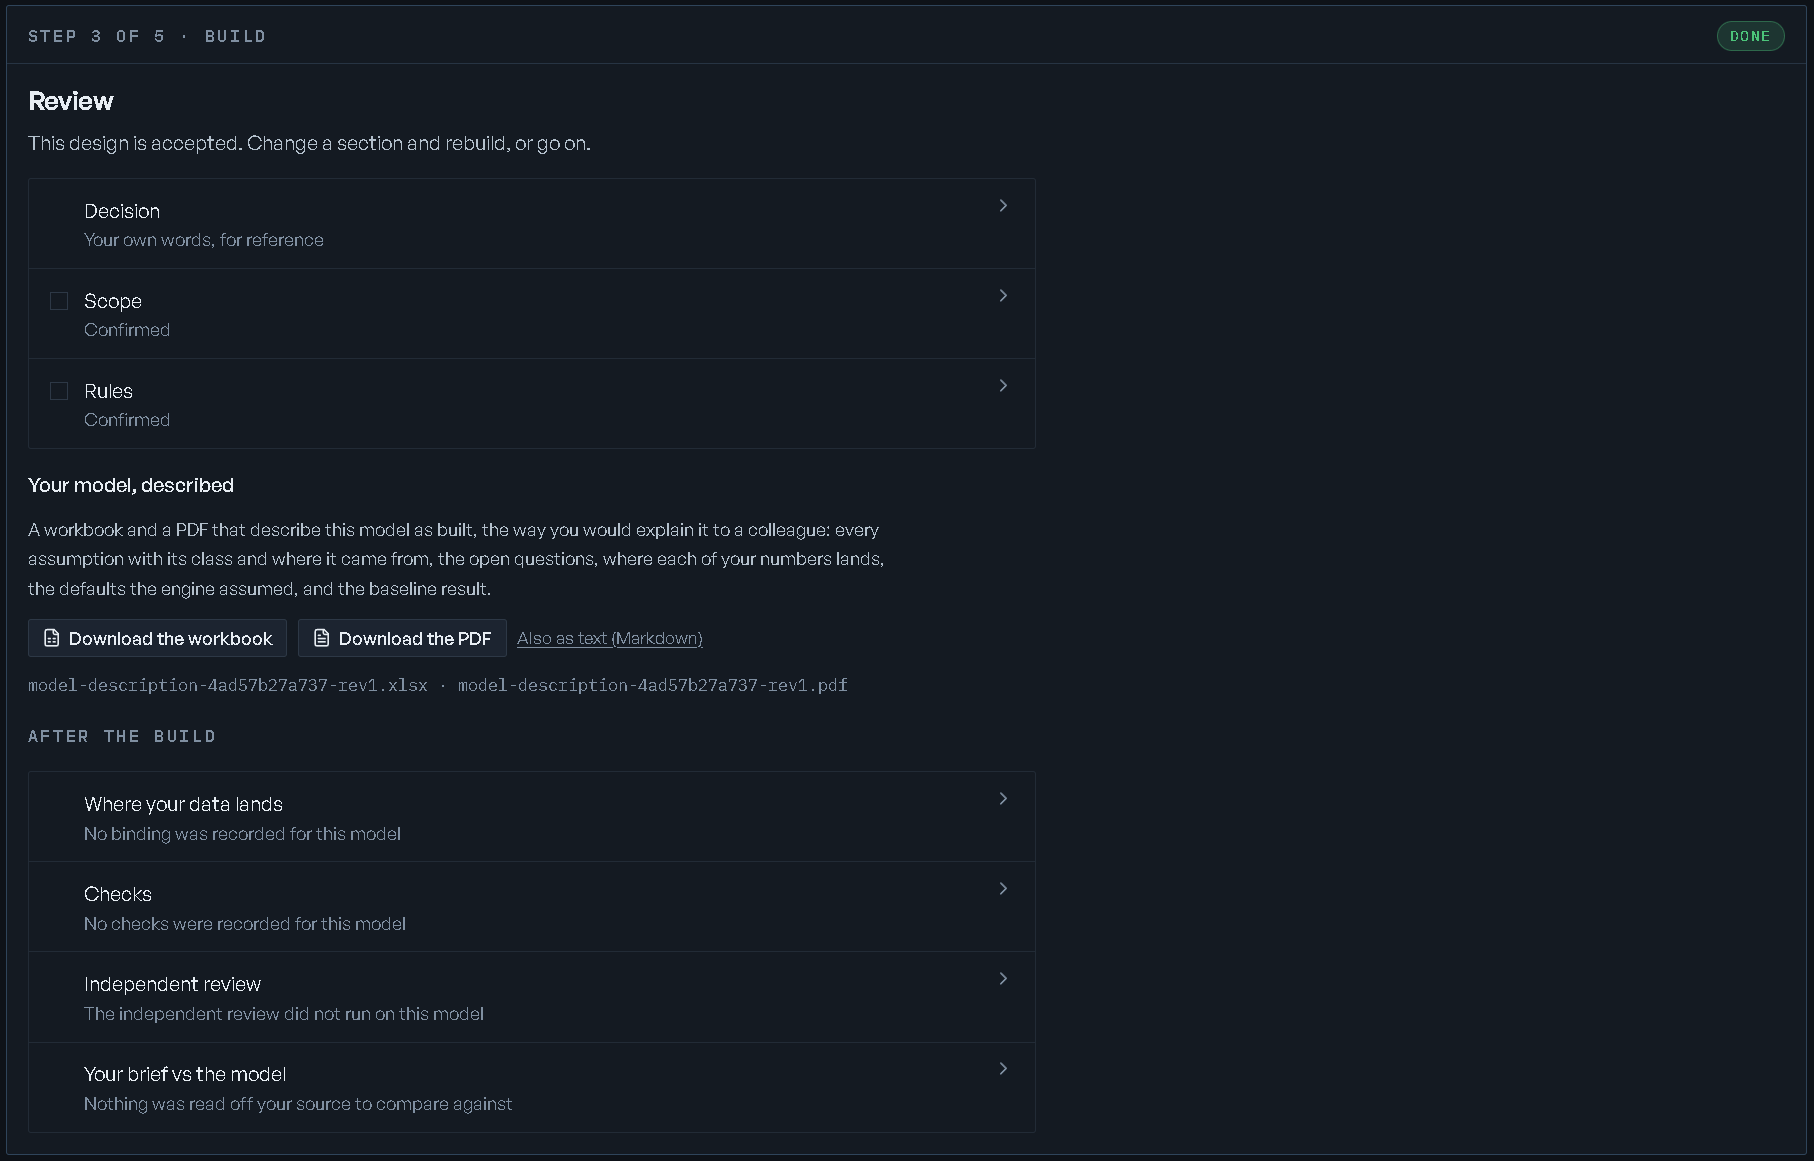
Review is a read-only index over the whole step; you reach it from the step rail. Once the design is accepted it reads "This design is accepted. Change a section and rebuild, or go on." Every section is listed with its standing — Confirmed, Needs correcting: and your note, Not confirmed yet, or, for the decision, Your own words, for reference — each folding open to its full content. Nothing is decided here: until the design is accepted, Next sends you back to Check the design.
Below the sections is Your model, described: a workbook and a PDF that describe the model the way you would explain it to a colleague, as Download the workbook and Download the PDF, with Also as text (Markdown) beside them. Before the build they describe the design; after it, the model as built. The same card ends step 5 and sits on the model home.
Last, AFTER THE BUILD repeats the four readouts from Building, each folding open.
Step 4 — Load data
The intro is "Now the numbers". What it offers depends on what the build ran on.
Sample data, or your own? gives two cards:
- Create the baseline with sample data — "The generated numbers stay. Load yours later from the model page." (When the build read a dataset you attached, this reads Create the baseline with that dataset instead.)
- Load my own data — "Point each table at a dataset, with RIA's help where the shape differs."
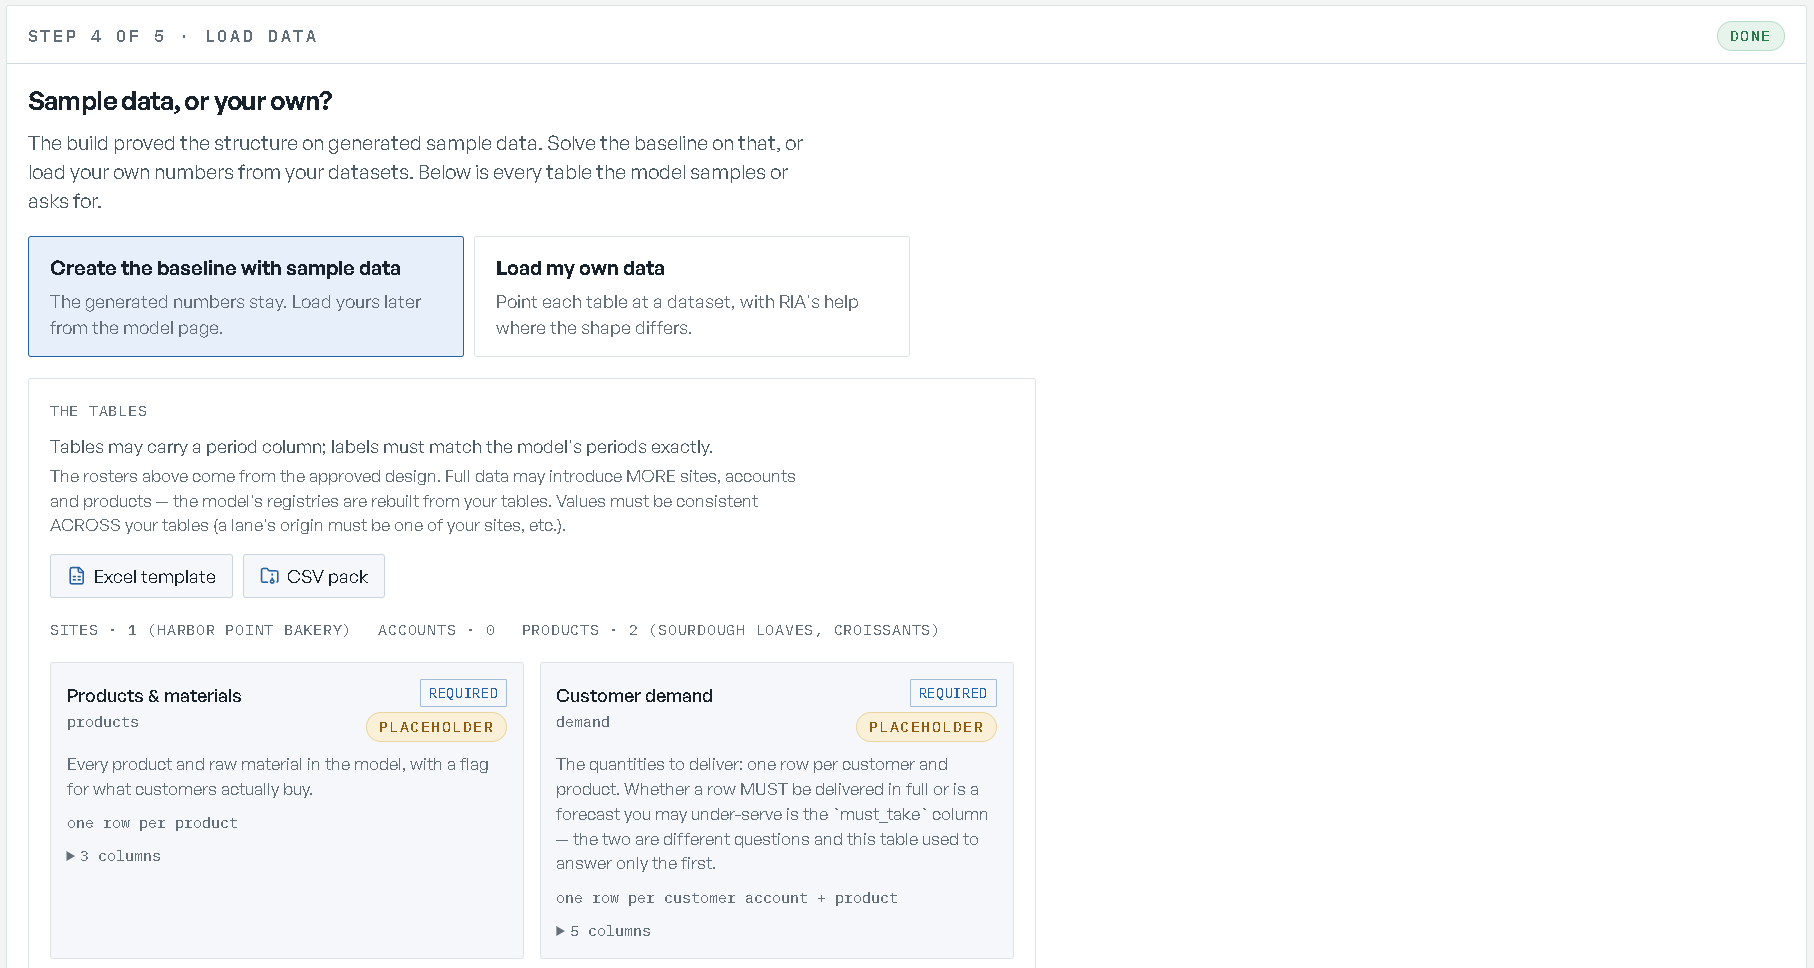
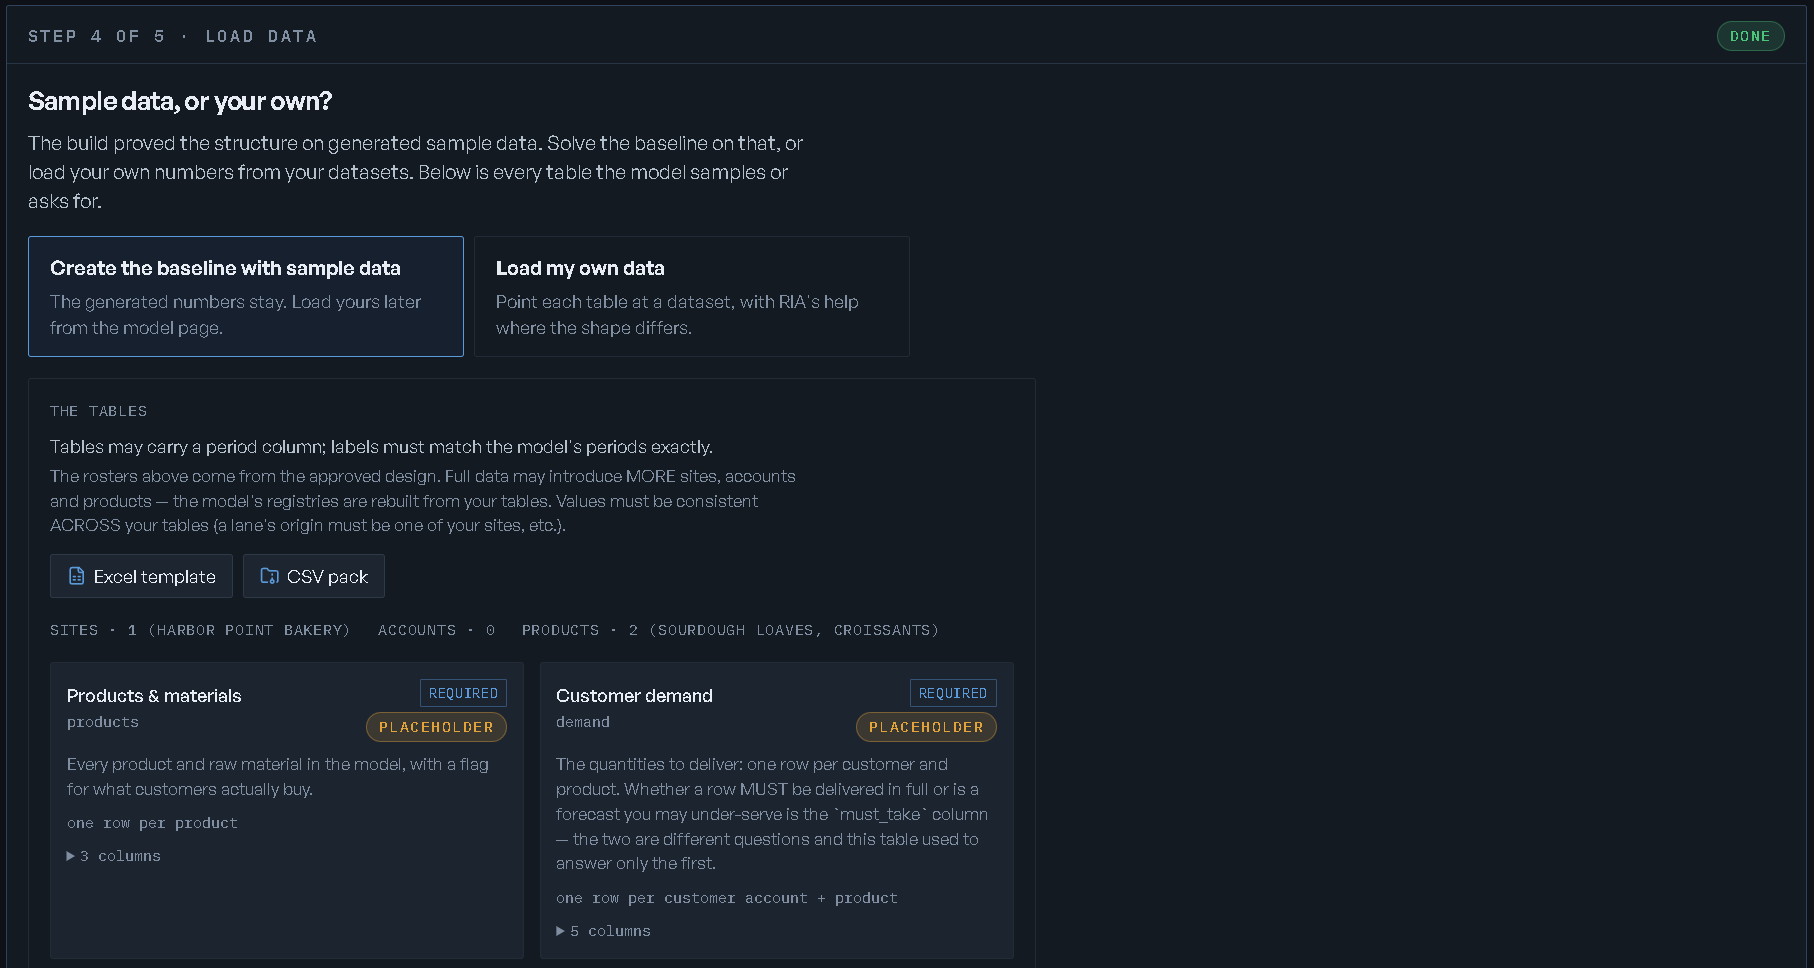
The row under Load data in the step rail reads Sample data, or your own. Under the two
cards, THE TABLES lists every table the model samples or asks for, one card each: the table's
name, what it holds, and what one row stands for, with a REQUIRED chip (or OPTIONAL) and,
where the table holds sample numbers until you add yours, a PLACEHOLDER chip. A fold with the
column count — 6 columns — lists the columns. Excel template and CSV pack download the
same tables as a workbook or as a set of CSV files: "The templates ship with example rows from the
verified sample model — replace them with your data; quantities load verbatim."
Two other headings are also real, and neither means anything was lost:
- This model did not ask you for data — "No list of tables was drawn up for this model, so there is nothing here to load against. It runs on the numbers your description gave it. Next creates the baseline; you can load datasets later from the model page."
- Nothing more to load — every table it asks for is already filled.
Either way, the row under Load data in the step rail reads Nothing more to load.
Pointing tables at datasets
Load your own data is a hub with one row per table — Required · 6 columns — and an Add
button each. Tables the design can fill itself are listed, not asked for. Changed your mind? Under
the title, "No data to load yet?" offers Create the baseline with sample data, which keeps the
sample numbers and goes straight to Solve.
A table's own screen holds:
- A Datasource select — "Pick a dataset…", options reading
name · source. Not there yet? The screen links you to the Dataset Library to import it, then come back and pick it. - The proposed binding, once RIA finishes "Proposing how this dataset binds" — every column it matched, with confidence. Edit anything and Re-score with these changes.
- Talk to RIA about this data — a per-table conversation for how the dataset should be read: "which column is the site, what the units are, what to leave out." Every message is kept here and in the RIA console.
Review your datasources then lists each table as dataset · 87% match · 2 notes to RIA, or
Required · no datasource yet / Optional · skipped. Next is the CTA Bind the data to
the model.
When the binding lands you get "Your data, bound to the model" — "Check the binding, then solve the baseline on your numbers." — with the validation report and the CTA Accept and solve. Blocking findings need an override with a reason; a fatal one has to be fixed at the datasource and bound again.
A model built from a workbook reviews its imported numbers here instead, under "Review your imported data" — category by category, against the cells they came from. See Bring your existing spreadsheet.
Step 5 — Solve
The intro is "Let us solve it": "I solve the baseline on the loaded data" · "I read it back to you in your words" · "If it reads right, you are done here".
Your model is the last look before the solve — "Everything is in place. Next solves the
baseline." — over four facts: DATASOURCES (the dataset, or Sample data), TOPOLOGY
(6 objects · 4 links), OBJECTIVE — what you said to optimize, in your words — and
BASELINE, which reads TBD until it lands. The model diagram renders underneath. A model rebuilt since its last solve also reads TBD: "The
model was rebuilt since its last solve. Next solves the baseline again."
Next is Solve for your baseline, and it confirms first: "This submits a request to solve the baseline on the data you loaded. The card fills in when it lands; you can leave the page while it runs." Solve starts it. While it runs there is a Stop button. When it lands the screen reads "The baseline is solved" — "The baseline is on the record. Next reads it back."
Your baseline
The last screen is "Your baseline" — "Does this read like your business?" It shows the
objective under the goal you typed at What to optimize — weekly profit, say, in your own
words — then a narration of the result in business language when the solve returns one, and
THE NUMBERS IT TRACKS: the KPIs the model will carry from here on. A model that never stated a
goal in words, such as one brought in through Advanced imports, labels the
number BEST OBJECTIVE, LOWEST TOTAL COST for a model that minimizes cost, or AS SET IN THE
MODEL FILE for an imported model file. Under the KPIs is Your model, described, now as built
and solved: Download the workbook, Download the PDF and Also as text (Markdown).
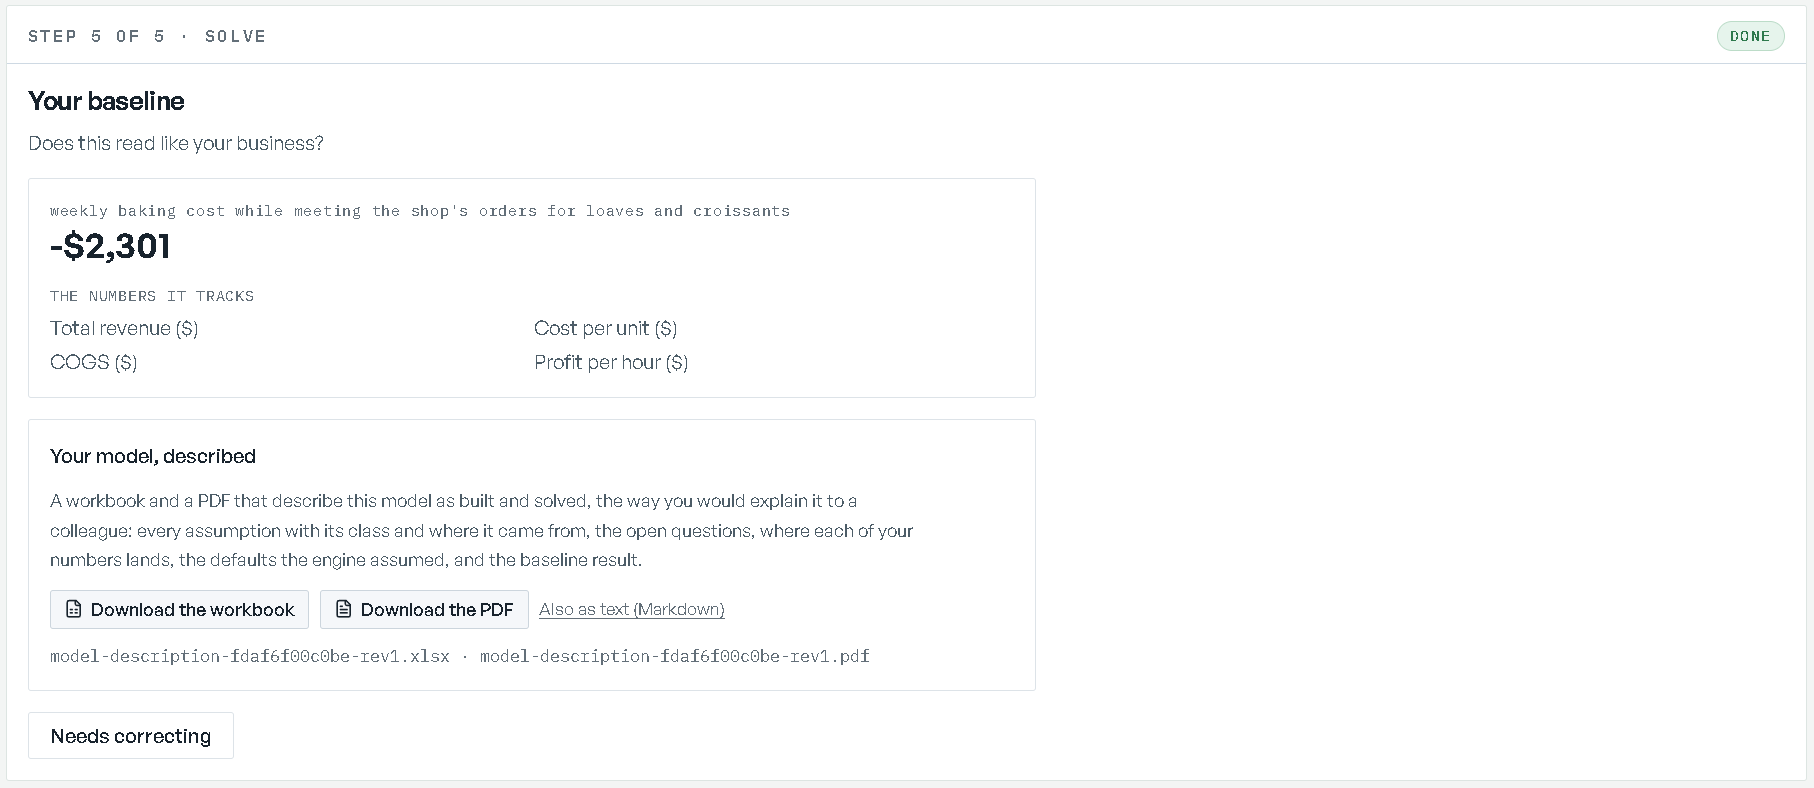
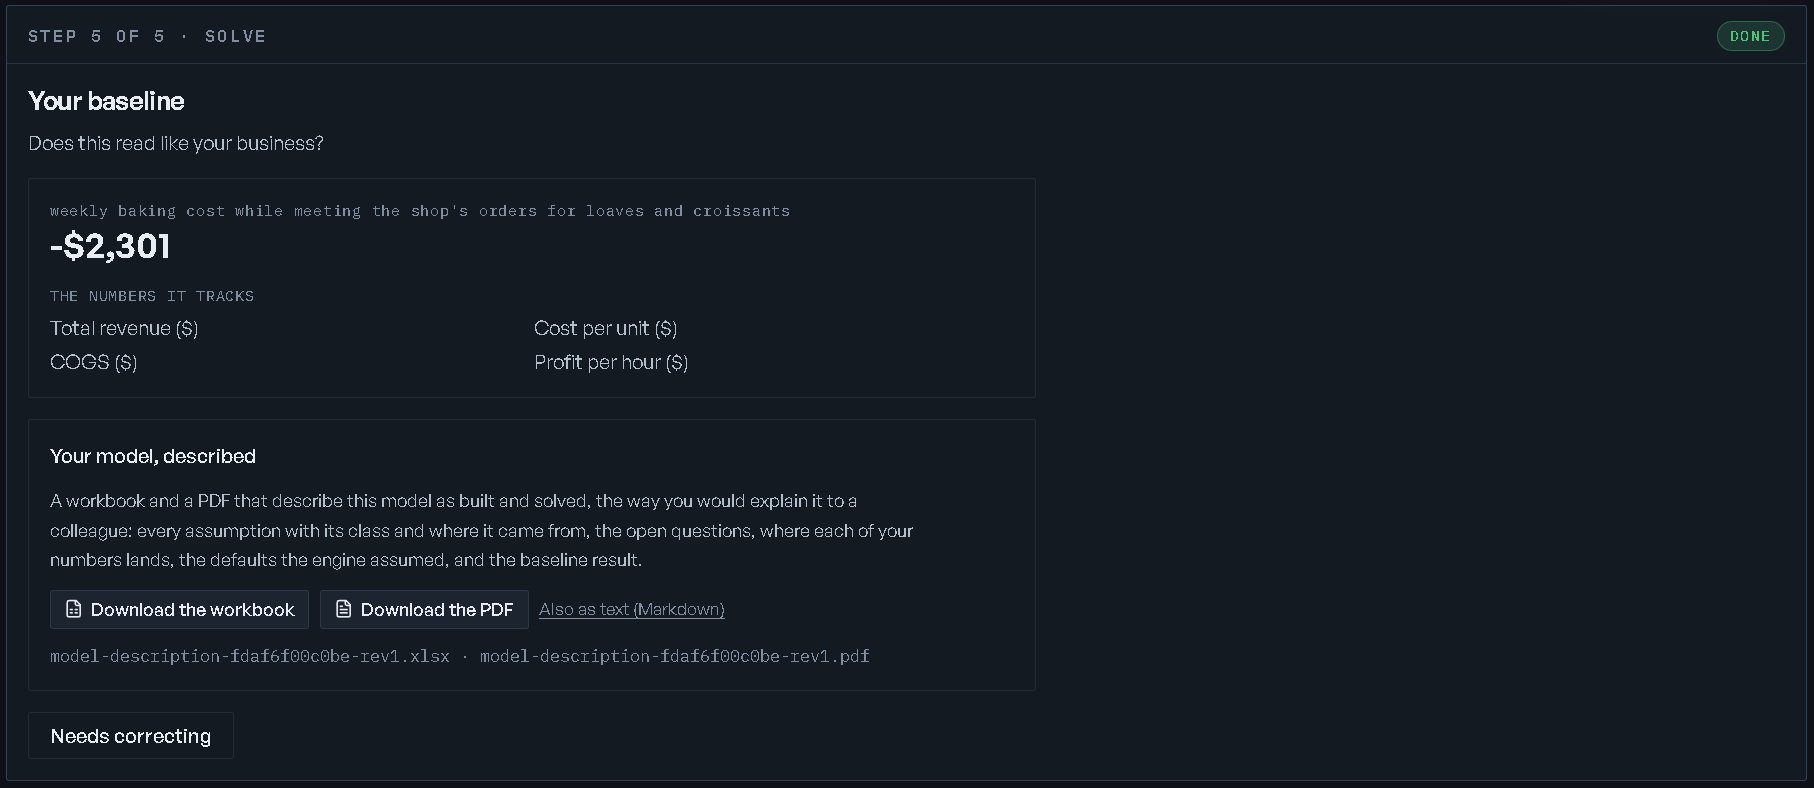
If it does not read right, Needs correcting asks "What reads wrong?" and takes a note — "Overtime should be capped at 16 hours; the baseline uses 40". Send back returns the model to Clarify with your note on the record; edit anything, then build and solve again.
A baseline cost of $0 has a specific cause, and the screen says so: "A cost of $0 means the plan
served nothing: no demand was owed, so the cheapest plan makes and sells nothing. If the demand
must be met, go back to Clarify and say so; the baseline then carries a real cost."
Go to Model Overview ends the wizard and opens the model home, where the same five steps stay on the record and the Base scenario is ready for what-ifs.
Advanced imports
Picking Advanced at step 1 replaces the describe hub with "Use advanced imports" — "Pick one. The model you bring is the model: nothing is authored on top of it." Three rows, one per model.
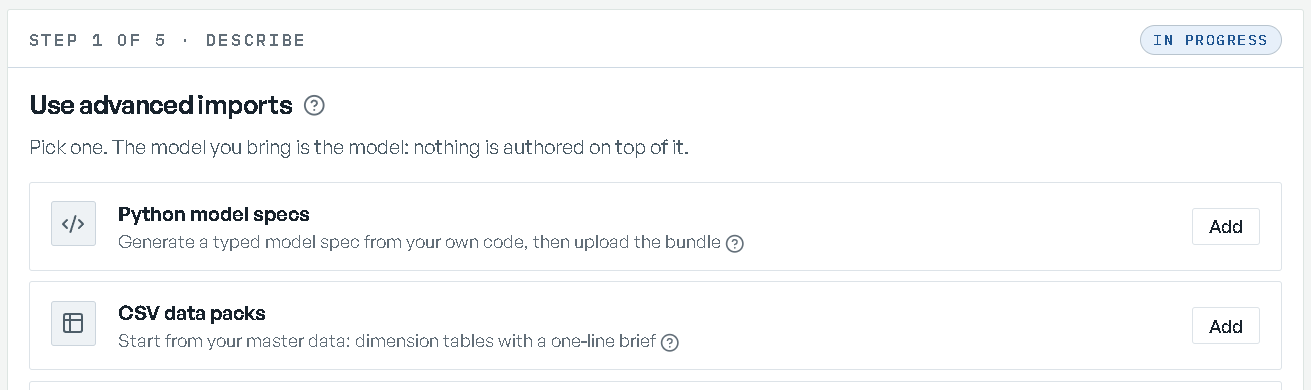
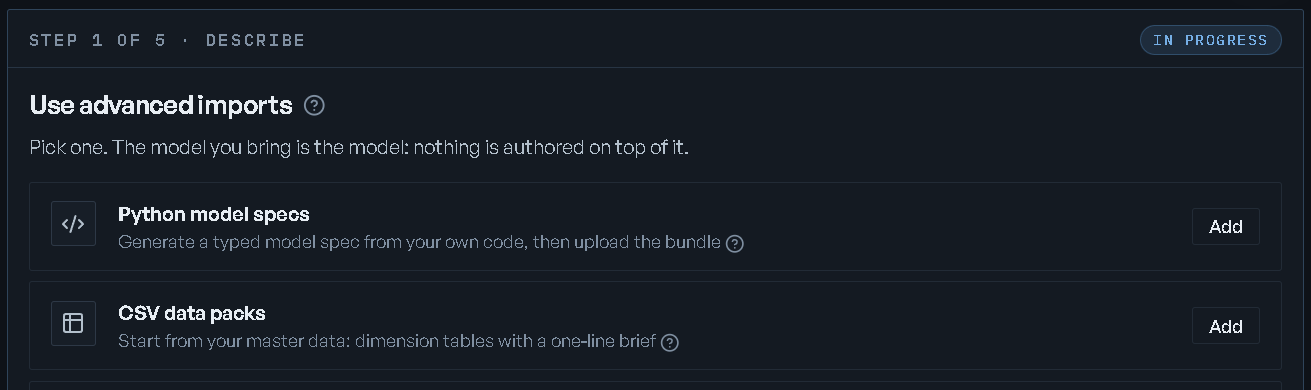
Python model specs
"Generate a typed model spec from your own code, then upload the bundle." Two screens. Get the
starter hands you the contract first: Starter script and JSON schemas are both downloads,
under the line your script → spec.json → validated build. Upload your spec then takes "The
spec.json your script emitted, or the .zip with data/*.csv inside it." via Upload spec (.json /
.zip). Review structure before building is ticked by default — untick it to build straight
through. Finish starts the build.
CSV data packs
"Start from your master data: dimension tables with a one-line brief." Two screens. Your brief
and objective takes one line — "One line: what should this model decide? (e.g. weekly production
mix across our plants)" — and an Objective of Maximize profit or Minimize cost. Then
Choose dimension tables takes .csv or .xlsx, one per table.
This lane reads your tables by name, so name them the way it expects: products with a product
column for what you sell, works with a works column for sites, and customers with a
customer_account column for accounts. Capitals, spaces and punctuation do not matter, but the
words do. Two starters are on the screen if you would rather begin from them: Starter workbook
(.xlsx) and Starter tables (.csv zip).
Finish scaffolds the structure on your names, proven on seed data; your transactional numbers bind at step 4.
An existing model file
Imports the structure from a model file you already have — a .corz. Run a base solve after
import is off by default; tick it to populate the objective and create the Base scenario in the
same step. Spreadsheets do not belong here: they come in as datasets, through
step 1's datasources.
One import per model. Opening a second row asks "Switch imports?" — "One import per model. Switching drops" the first "and opens" the second. And the file you pick lives only on the screen: if you reload, or come back to the model later, the name is kept but the file is not, and Next asks you to pick it again.
All three lanes mint the model, skip Clarify, and land on step 3's build — Building, Check the design and Review work exactly as they do in Basic.
Going back and changing your mind
Previous never rebuilds anything, and the step rail lets you jump to any screen you have already passed. Crossing a step boundary backwards lands you on that step's last screen; opening a step from the rail opens its first.
Editing a step that has work after it asks first, and names what has to be redone. "Nothing you entered is lost."
| Editing | You are asked | What is redone |
|---|---|---|
| Step 1 | Edit the description? | the questions, the build, the data and the baseline |
| Step 2 | Change your answers? | the build, the data and the baseline |
| Step 4 | Change the data? | the baseline |
Next
- Model home — the model's record, and the five steps after the wizard.
- Validation and trust — the standing trust record for a built model.
- Scenarios and what-ifs — asking questions against the baseline.
- Changing a model — reopening the structure after the build.